DIY baby food is a wonderful way to provide your little one with fresh, nutritious, and flavorful meals. It’s an empowering journey that allows you to control the ingredients and texture of your baby’s food, ensuring they receive the best possible nourishment. This process is not only beneficial for your baby’s health but also a rewarding experience for you as a parent.
Table of Contents
By preparing homemade baby food, you can avoid the added sugars, preservatives, and artificial flavors often found in commercially prepared options. This gives you the peace of mind knowing exactly what goes into your baby’s meals. Moreover, making your own baby food can be a fun and engaging activity, allowing you to bond with your little one while introducing them to a variety of flavors and textures.
Benefits of DIY Baby Food

Making your own baby food can be a rewarding experience, offering numerous advantages for both you and your little one. From nutritional benefits to cost savings, there are many reasons why parents choose to prepare homemade baby food.
Nutritional Advantages
Homemade baby food allows you to control the ingredients, ensuring your baby receives the highest quality nutrition. You can select fresh, organic produce, avoiding the added sugars, preservatives, and artificial flavors often found in commercially prepared baby food. This is particularly important for babies with allergies or sensitivities, as you can tailor the food to their specific needs.
Cost-Effectiveness
Making your own baby food can be significantly more cost-effective than buying pre-made jars or pouches. While the initial investment in a blender or food processor might be necessary, the long-term savings on baby food can be substantial. You can also use leftover ingredients from family meals, reducing food waste and maximizing your budget.
Reduced Exposure to Additives and Preservatives
Commercial baby food often contains additives, preservatives, and other ingredients that may not be ideal for a baby’s developing system. By making your own food, you can eliminate these potentially harmful substances and provide your baby with a pure and natural diet.
Controlling Ingredients and Texture
Making your own baby food gives you complete control over the ingredients and texture. You can adjust the recipe based on your baby’s preferences and developmental stage, ensuring they are getting the right amount of nutrients and the appropriate texture for their age.
Getting Started with DIY Baby Food
Embarking on the journey of creating homemade baby food is exciting and rewarding. It allows you to control the ingredients, ensuring your little one receives the best possible nutrition. To begin this endeavor, you’ll need to gather essential equipment, select the right ingredients, and understand the basics of preparation and storage.
Essential Equipment and Ingredients
Having the right tools and ingredients is crucial for a smooth and successful DIY baby food experience.
- Steamers: A steamer is essential for gently cooking fruits and vegetables, preserving their nutrients and flavor. Look for a steamer with multiple tiers for efficient cooking.
- Blender or Food Processor: A blender or food processor is necessary for pureeing cooked ingredients into a smooth and easy-to-digest texture for your baby.
- Ice Cube Trays: These are useful for freezing portions of baby food, allowing you to create individual servings for later use. Choose silicone trays for easy removal.
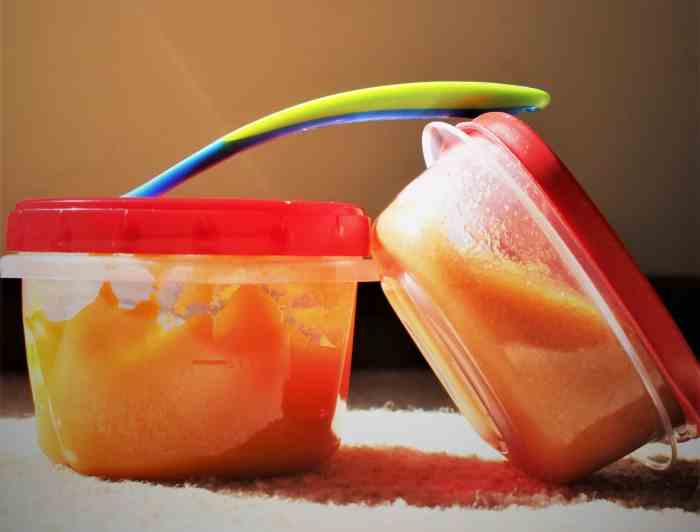
- Storage Containers: Opt for airtight containers for storing prepared baby food in the refrigerator or freezer. Glass or BPA-free plastic containers are ideal.
- Spoons: A set of small spoons is essential for feeding your baby. Choose spoons with soft, rounded edges to prevent irritation.
- Fruits: Start with soft fruits like bananas, avocados, apples, pears, peaches, and mangoes. Introduce new fruits gradually, observing for any allergic reactions.
- Vegetables: Begin with mild-flavored vegetables such as sweet potatoes, carrots, zucchini, peas, and green beans. Introduce more flavorful vegetables like broccoli, spinach, and cauliflower gradually.
- Grains: Introduce rice cereal as a first grain, followed by oats and barley. These provide essential nutrients and fiber.
- Protein: Introduce protein sources like lentils, beans, and tofu gradually. These provide essential amino acids for growth and development.
Selecting the Right Fruits and Vegetables
Choosing the right fruits and vegetables is paramount for providing your baby with essential nutrients and flavors.
- Freshness: Opt for fresh, ripe fruits and vegetables with vibrant colors and firm textures. Avoid any that have bruises, blemishes, or signs of spoilage.
- Organic: Consider choosing organic fruits and vegetables whenever possible to minimize exposure to pesticides and herbicides.
- Variety: Introduce a variety of fruits and vegetables to expose your baby to different flavors and nutrients. This helps foster a healthy relationship with food.
- Seasonality: Opt for seasonal fruits and vegetables for optimal freshness and flavor. These are often more readily available and cost-effective.
Preparing and Storing Ingredients
Proper preparation and storage ensure the freshness and safety of your homemade baby food.
- Washing: Thoroughly wash all fruits and vegetables under running water to remove dirt, debris, and pesticides. Use a vegetable brush to scrub firm vegetables.
- Peeling: Peel fruits and vegetables that have tough skins or peels. Remove seeds and cores from fruits.
- Cutting: Cut fruits and vegetables into smaller pieces for easier steaming and blending.
- Steaming: Steam fruits and vegetables until tender, preserving their nutrients and flavors. Use a steamer basket over boiling water.
- Freezing: Freeze prepared baby food in ice cube trays or storage containers. Label and date each portion for easy identification and freshness tracking.
- Thawing: Thaw frozen baby food in the refrigerator overnight. You can also thaw individual portions in a microwave for a quicker option.
Safety Precautions and Hygiene Practices
Maintaining proper hygiene is crucial for ensuring the safety of your homemade baby food.
- Wash Hands: Wash your hands thoroughly with soap and water before and after handling food.
- Clean Surfaces: Clean and sanitize all surfaces, utensils, and equipment that come into contact with food. Use a mild bleach solution or a food-safe disinfectant.
- Separate Raw and Cooked Food: Use separate cutting boards and utensils for raw and cooked food to prevent cross-contamination.
- Refrigerate Promptly: Refrigerate prepared baby food within two hours of cooking. Store in airtight containers to prevent spoilage.
- Discard Leftovers: Do not reheat or reuse leftover baby food. Discard any unused portions after feeding your baby.
Basic DIY Baby Food Recipes

Introducing your baby to solid foods is an exciting milestone. Homemade baby food allows you to control the ingredients, ensuring your baby receives the best possible nutrition. This section provides simple and versatile recipes for purees and mashed foods, catering to different age groups and developmental stages.
First Foods for Babies 4-6 Months
Starting with single-ingredient purees is crucial for identifying potential allergies. These recipes are smooth and easy to digest, perfect for babies just beginning their solid food journey.
- Sweet Potato Puree: Steam or bake a sweet potato until tender. Mash it thoroughly with a fork or blend until smooth. This puree is naturally sweet and packed with vitamin A.
- Avocado Puree: Mash a ripe avocado with a fork until smooth. This puree is rich in healthy fats and nutrients.
- Banana Puree: Mash a ripe banana with a fork or blend until smooth. This puree is a good source of potassium and fiber.
Introducing New Flavors and Textures 6-9 Months
As your baby gets older, you can introduce more complex flavors and textures.
- Apple and Pear Puree: Steam or bake an apple and a pear until tender. Blend them together until smooth. This puree is a good source of fiber and vitamins.
- Carrot and Zucchini Puree: Steam or bake a carrot and zucchini until tender. Blend them together until smooth. This puree is a good source of vitamins and minerals.
- Pea and Green Bean Puree: Steam or cook peas and green beans until tender. Blend them together until smooth. This puree is a good source of protein and fiber.
Finger Foods for Babies 9-12 Months
Around 9 months, babies start developing their pincer grasp and can begin to self-feed. Finger foods provide a fun and engaging way to explore textures and flavors.
- Soft Cooked Sweet Potato: Steam or bake a sweet potato until tender and easily mashed with a fork. Cut into small, manageable pieces for your baby to pick up.
- Steamed Broccoli Florets: Steam broccoli florets until tender but still firm. Cut into small pieces for your baby to pick up.
- Scrambled Eggs: Scramble eggs with a little milk and cook until just set. This provides a good source of protein.
Tips for Adjusting Recipes
- Thinning: If your baby prefers a thinner consistency, add a little breast milk, formula, or water to the puree.
- Thickening: If your baby prefers a thicker consistency, add a little cooked oatmeal or rice cereal to the puree.
- Sweetness: If your baby prefers a sweeter flavor, add a little mashed banana or unsweetened applesauce to the puree.
- Salt and Sugar: Avoid adding salt and sugar to baby food. It is important to keep your baby’s diet as natural and healthy as possible.
Advanced DIY Baby Food Techniques
As your baby grows, their nutritional needs change. They require a wider variety of foods to support their development. Introducing meats, poultry, and fish can be a great way to provide them with essential proteins, iron, and other nutrients. Additionally, you can start experimenting with homemade baby food snacks and finger foods to encourage self-feeding and develop fine motor skills.
Incorporating Meats, Poultry, and Fish
Adding protein sources like meats, poultry, and fish to your baby’s diet is important for their growth and development.
Here are some tips:
* Start with lean, boneless options: Chicken breast, ground turkey, and cod are good choices for starting.
* Cook thoroughly: Always cook meats, poultry, and fish thoroughly to kill any bacteria.
* Puree or finely chop: Depending on your baby’s age, you can puree these foods or finely chop them.
* Introduce gradually: Introduce one new food at a time to monitor for any allergic reactions.
* Combine with other foods: You can combine meats, poultry, and fish with other ingredients like vegetables, fruits, and grains to create a variety of flavors and textures.
Here are some recipes:
* Chicken and Sweet Potato Puree: Boil chicken breast and sweet potato until tender. Puree together until smooth.
* Turkey and Green Bean Puree: Cook ground turkey and green beans until cooked through. Puree together until smooth.
* Cod and Carrot Puree: Bake cod fillets with chopped carrots until cooked through. Puree together until smooth.
Homemade Baby Food Snacks and Finger Foods
Homemade baby food snacks and finger foods are a great way to encourage self-feeding and develop fine motor skills.
Here are some ideas:
* Fruit and Veggie Sticks: Cut fruits and vegetables like bananas, apples, carrots, and cucumbers into small, bite-sized pieces.
* Yogurt Melts: Mix yogurt with mashed banana or avocado. Spoon into ice cube trays and freeze.
* Oatmeal Muffins: Combine oats, mashed banana, and eggs. Bake in a muffin tin until cooked through.
* Sweet Potato Fries: Cut sweet potatoes into thin strips. Bake or air-fry until crispy.
Freezing and Reheating Baby Food
Freezing homemade baby food is a convenient way to store it and have it readily available.
Here are some tips:
* Use ice cube trays: Portion baby food into ice cube trays and freeze. Once frozen, transfer to freezer-safe bags or containers.
* Label and date: Label each bag or container with the contents and date.
* Reheat gently: Thaw frozen baby food in the refrigerator overnight or reheat gently in a saucepan on the stovetop. Avoid using the microwave as it can destroy nutrients.
Introducing New Foods and Managing Allergies
Introducing new foods to your baby is an exciting process, but it’s important to do so safely and gradually.
Here are some tips:
* Start with one new food at a time: This allows you to monitor your baby for any allergic reactions.
* Introduce new foods one at a time for 3-5 days: If your baby has no reaction, you can introduce another new food.
* Offer new foods in small amounts: Start with a teaspoon and gradually increase the amount as your baby tolerates it.
* Watch for signs of allergies: Signs of allergies can include rash, hives, swelling, vomiting, diarrhea, or wheezing.
* Talk to your pediatrician: If you have any concerns about introducing new foods or managing allergies, talk to your pediatrician.
DIY Baby Food Storage and Handling

Making your own baby food is a rewarding experience, but proper storage and handling are crucial to ensure its safety and quality. This section will guide you through the best practices for storing homemade baby food in the refrigerator and freezer, thawing and reheating frozen baby food safely, and managing your baby food supply efficiently.
Refrigerator Storage
Refrigerator storage is ideal for homemade baby food that will be consumed within a few days. To ensure freshness and safety, follow these guidelines:
* Use airtight containers: Store baby food in clean, airtight containers made of glass, plastic, or silicone. This prevents contamination and preserves the food’s texture and flavor.
* Refrigerate promptly: Once prepared, immediately refrigerate the baby food to maintain its quality.
* Label and date: Clearly label each container with the date of preparation to track its freshness.
* Refrigerator shelf life: Refrigerated homemade baby food is typically safe to consume for 3-5 days. However, it’s best to use it within 2-3 days for optimal flavor and nutrient content.
Freezer Storage, Diy baby food
For longer storage, freezing is a great option. Freezing allows you to preserve homemade baby food for several months, making it convenient for meal planning and future use.
* Use freezer-safe containers: Opt for freezer-safe containers made of glass, plastic, or silicone. Ensure the containers are tightly sealed to prevent freezer burn.
* Portion appropriately: Divide the baby food into smaller portions, typically 2-3 ounces, for easy thawing and use.
* Leave space for expansion: When freezing, leave some space at the top of the container to accommodate expansion as the food freezes.
* Label and date: Clearly label each container with the date of preparation.
* Freezer shelf life: Frozen homemade baby food can typically be stored for 3-6 months.
Thawing and Reheating
When ready to use frozen baby food, it’s important to thaw and reheat it safely.
* Thawing methods:
* Refrigerator: Thaw frozen baby food overnight in the refrigerator. This is the safest and most recommended method.
* Cold water bath: Place the container in a bowl of cold water, changing the water every 30 minutes until thawed.
* Microwave (not recommended): Microwaving can lead to uneven heating and potential hot spots. Avoid this method unless absolutely necessary.
* Reheating methods:
* Stovetop: Gently reheat the thawed baby food in a saucepan over low heat, stirring frequently to prevent burning.
* Microwave (not recommended): If using a microwave, reheat in short intervals, stirring well between each interval to ensure even heating.
* Warm water bath: Place the container in a bowl of warm water until the baby food reaches a safe temperature.
Labeling and Dating
Proper labeling and dating are essential for efficient food management.
* Clear labels: Use permanent markers to label containers with the type of food, date of preparation, and any special instructions.
* Date format: Use a clear date format, such as month/day/year.
* Visual cues: Consider using color-coded labels or stickers to categorize different types of baby food, such as fruits, vegetables, or meat.
Using Leftovers Creatively
Leftover baby food can be used creatively in various dishes.
* Blend into smoothies: Add leftover baby food to smoothies for extra flavor and nutrients.
* Mix into yogurt or oatmeal: Incorporate leftover baby food into yogurt or oatmeal for a nutritious and flavorful breakfast or snack.
* Use in baking: Add pureed baby food to muffins, pancakes, or cookies for extra moisture and flavor.
* Create sauces: Combine leftover baby food with herbs, spices, and other ingredients to create flavorful sauces for pasta, rice, or other dishes.
Embarking on the DIY baby food journey is a rewarding experience that empowers you to create delicious and healthy meals for your little one. With a little planning and preparation, you can easily incorporate fresh ingredients and flavors into your baby’s diet, promoting their growth and development. Remember, this is a journey of exploration and discovery, so don’t be afraid to experiment with different recipes and textures. Your baby’s taste buds will thank you for it!
Making your own baby food can be a rewarding experience, allowing you to control the ingredients and ensure freshness. While researching safe and healthy options, you might come across information about medications like adalimumab , which is used to treat certain autoimmune diseases. However, it’s crucial to remember that such medications are not related to baby food preparation and should only be used under the guidance of a medical professional.

