DIY metal carports offer a practical and affordable solution for vehicle storage, workshops, or outdoor living spaces. Building your own carport allows for customization, cost savings, and a sense of accomplishment. Whether you’re a seasoned DIYer or a novice, the process can be rewarding and achievable with careful planning and execution.
Table of Contents
This guide will walk you through the steps involved in constructing a DIY metal carport, from planning and design to materials, foundation, framing, roofing, and maintenance. We’ll also discuss safety precautions, cost considerations, and tips for success.
Introduction to DIY Metal Carports
DIY metal carports are becoming increasingly popular as a cost-effective and practical solution for protecting vehicles, equipment, and other valuables from the elements. These structures are typically made from durable, weather-resistant materials and can be assembled with minimal tools and expertise.
DIY metal carports offer a range of benefits, including affordability, ease of installation, and versatility. They can be customized to fit specific needs and preferences, providing a secure and sheltered space for various purposes. However, choosing the right DIY metal carport involves careful consideration of several factors, including size, style, and materials.
Understanding Building Codes and Permits
Before embarking on any DIY metal carport project, it is crucial to understand and comply with local building codes and obtain necessary permits. These regulations vary from location to location and are designed to ensure the safety and structural integrity of the carport. Failure to comply with building codes can result in fines, legal issues, and potential safety hazards.
It is essential to consult with your local building department or a qualified professional to determine the specific requirements for your area. This may include obtaining blueprints, securing permits, and complying with zoning regulations.
“Understanding local building codes is essential for a safe and legal DIY metal carport project.”
Planning and Design

Building a DIY metal carport is a great way to protect your vehicles and other belongings from the elements. However, proper planning and design are essential to ensure a sturdy and functional structure.
Site Preparation and Measurements
Before you begin construction, you need to carefully prepare the site and take accurate measurements. This includes clearing the area of any debris, ensuring the ground is level, and marking the boundaries of the carport.
- Clear the area: Remove any trees, bushes, or other obstacles that might interfere with the construction. Ensure the area is free of debris like rocks, branches, or other materials that could affect the levelness of the ground.
- Check for underground utilities: Before digging, contact your local utility companies to locate any underground lines, such as power, gas, or water. This will prevent accidental damage during the construction process.
- Ensure the ground is level: A level foundation is crucial for a stable carport. Use a level and a shovel to adjust the ground, removing high spots and filling in low spots.
- Mark the boundaries: Use stakes and string to mark the dimensions of your carport. Make sure the measurements are accurate, as they will determine the size of the structure.
- Consider the slope of the ground: If the ground is sloped, you’ll need to factor this into your design. A slight slope will help with drainage, but a steep slope may require additional support.
Types of Metal Carport Designs
Metal carports come in various designs, each with its advantages and disadvantages. The most common types include:
- Single-slope: This design features a roof that slopes in one direction. It’s simple to construct and relatively affordable. A single-slope carport is a good choice for areas with minimal snowfall.
- Gable: A gable roof has a triangular shape with two slopes meeting at a peak. This design offers more headroom and is better suited for areas with heavy snowfall. However, it is slightly more complex to construct.
- Lean-to: This design is attached to an existing structure, such as a house or garage. It’s an economical option for adding extra shelter to your property. A lean-to carport is typically single-slope, but can also be gable-shaped.
Selecting the Right Size and Style
The size and style of your metal carport will depend on your specific needs and preferences. Consider the following factors:
- Number of vehicles: Determine how many vehicles you need to shelter. The carport should be large enough to accommodate all your vehicles, with some extra space for maneuvering.
- Storage needs: If you plan to use the carport for storage, you’ll need extra space for shelves, bins, or other items. You may also want to consider adding a storage room to the design.
- Local building codes: Check with your local building department for any regulations regarding carport construction. This may include requirements for size, height, and wind resistance.
- Style and aesthetics: The style of your carport should complement your home and landscaping. Consider using different colors, materials, or trims to enhance the overall appearance.
Materials and Tools

Once you’ve finalized your carport design, it’s time to gather the necessary materials and tools. This section will Artikel the essential components for building a sturdy and long-lasting carport.
Metal Framing
The foundation of your carport lies in its steel framing. The type and size of steel you choose will influence the strength and durability of your structure.
- Steel Posts: These are the vertical supports that will hold up the roof and provide stability. Choose posts with a minimum diameter of 4 inches for optimal strength. The height of the posts will depend on your desired carport height.
- Steel Beams: These horizontal beams connect the posts and support the roof. The size of the beams will vary based on the span of your carport and the anticipated snow load.
- Steel Bracing: Bracing adds rigidity to the frame, preventing sway and ensuring structural integrity. Diagonal bracing is commonly used to reinforce the corners of the carport.
Roofing
The roofing material is crucial for protecting your vehicles from the elements. Metal roofing offers numerous advantages, including durability, longevity, and low maintenance.
- Corrugated Steel: This type of roofing is widely used due to its affordability and ease of installation. It’s characterized by its distinctive wave pattern and comes in various colors.
- Standing Seam: Standing seam metal roofing features a sleek, modern look and boasts superior water resistance. The panels are interlocked, creating a continuous seam that minimizes leaks.
- Metal Shingles: Metal shingles mimic the appearance of traditional asphalt shingles but offer greater durability and fire resistance. They come in various styles and colors to match your aesthetic preferences.
Fasteners
The right fasteners are essential for securing the framing and roofing components together. Use high-quality fasteners designed for outdoor applications.
- Self-Tapping Screws: These screws are designed to penetrate metal and form their own threads. They’re ideal for attaching steel framing components.
- Lag Bolts: Lag bolts provide strong and secure connections for heavy-duty applications. They’re typically used to connect posts to the foundation.
- Roofing Screws: Roofing screws are specially designed for attaching metal roofing panels to the framing. They feature a rubber washer that seals the screw head and prevents leaks.
Tools
Having the right tools will make the construction process much smoother and efficient.
- Tape Measure: A reliable tape measure is essential for accurate measurements.
- Level: A level ensures that your framing is plumb and your roof is level.
- Drill: A drill is necessary for drilling holes for fasteners and attaching roofing panels.
- Impact Driver: An impact driver provides extra torque for driving screws into metal.
- Circular Saw: A circular saw is helpful for cutting steel framing components to size.
- Safety Glasses: Safety glasses protect your eyes from flying debris.
- Work Gloves: Work gloves provide protection for your hands during construction.
Foundation and Installation
A stable foundation is crucial for a DIY metal carport. It supports the structure, preventing it from shifting or collapsing. The foundation should be strong enough to withstand the weight of the carport, as well as any additional loads, such as snow or wind.
Foundation Options
The type of foundation you choose will depend on factors like the size and weight of the carport, soil conditions, and local building codes.
- Concrete Piers: Concrete piers are a durable and long-lasting foundation option. They are typically made of concrete cylinders that are poured into the ground and allowed to cure. The piers should be spaced according to the manufacturer’s specifications for your carport kit. They provide excellent support and stability, especially in areas with unstable soil.
- Gravel Pads: Gravel pads are a more affordable option compared to concrete piers. They involve creating a level base of gravel, which is compacted and covered with a layer of landscape fabric to prevent weed growth. While gravel pads are easier to install, they might not be as durable or stable as concrete piers, especially in areas with heavy rainfall or freeze-thaw cycles.
- Anchor Bolts: Anchor bolts are used to secure the carport frame to the foundation. They are typically embedded in the concrete piers or gravel pads during the installation process. The size and number of anchor bolts will vary depending on the size and weight of the carport. They play a critical role in ensuring the stability and security of the carport structure.
Installing the Foundation
The installation process for each foundation type varies. Here’s a general overview:
- Concrete Piers:
- Excavate holes for the piers, ensuring they are deep enough and spaced according to the carport’s specifications.
- Install rebar or other reinforcement within the holes for added strength.
- Pour concrete into the holes and allow it to cure completely.
- Once the concrete has hardened, install the anchor bolts into the piers.
- Gravel Pads:
- Clear the area and excavate to create a level base for the gravel pad.
- Lay down a layer of gravel, ensuring it is compacted evenly to prevent settling.
- Cover the gravel with landscape fabric to control weed growth.
- Install the anchor bolts into the gravel pad, ensuring they are securely fastened.
Anchoring the Carport Frame
Once the foundation is installed, you can begin assembling the carport frame. Here’s how to anchor it:
- Align the frame: Carefully align the frame components over the foundation, ensuring they are level and plumb.
- Attach the frame to the anchor bolts: Use nuts and washers to securely fasten the frame to the anchor bolts. Ensure all connections are tight to prevent any movement or instability.
- Check for stability: After anchoring the frame, carefully check for any movement or instability. If you find any issues, readjust the frame or tighten the connections.
Tips for a Stable Foundation
Here are some additional tips for ensuring a stable and secure foundation for your DIY metal carport:
- Consult local building codes: Before starting the installation, check with your local building department to ensure your foundation meets all relevant codes and regulations.
- Use a level: Ensure the foundation is level and plumb before installing the carport frame. A level will help you achieve a stable and secure installation.
- Consider soil conditions: The type of soil in your area will impact the stability of your foundation. If you have unstable soil, you may need to use a more robust foundation option, such as concrete piers.
- Use high-quality materials: Use high-quality concrete, gravel, and anchor bolts for a durable and long-lasting foundation.
- Seek professional help: If you are unsure about any aspect of the foundation installation, it is always best to seek professional help.
Framing and Roofing

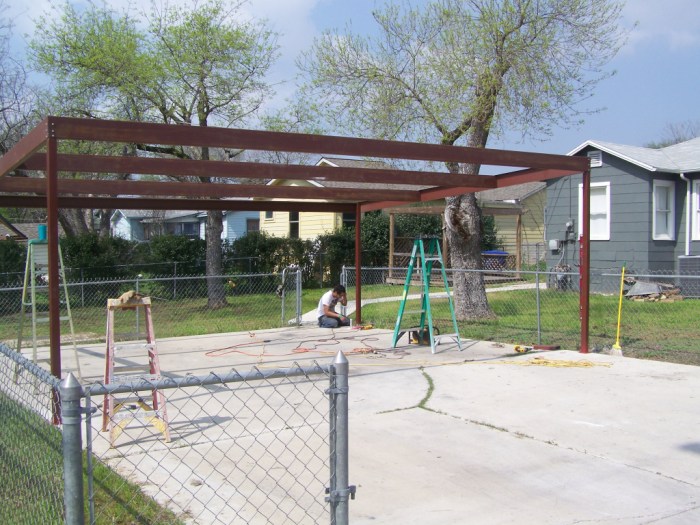
Once the foundation is in place, you can start assembling the metal carport frame. This step involves connecting the beams and posts, creating a sturdy structure to support the roof. After the frame is complete, you’ll install the roofing panels, ensuring they are securely fastened and sealed to protect your vehicle from the elements.
Assembling the Frame
This section Artikels the steps involved in assembling the metal carport frame, starting with the preparation of the components.
- Prepare the Components: Before you begin, carefully inspect all the components of the frame, ensuring they are free of any damage or defects. Organize the pieces according to the manufacturer’s instructions, making sure you have all the necessary parts.
- Connect the Beams: The beams form the horizontal support structure of the carport. Using the provided hardware, connect the beams to the posts, ensuring they are securely fastened. Follow the manufacturer’s instructions for the specific beam connection method. In most cases, this involves bolting the beams to the posts using self-tapping screws.
- Assemble the Trusses: If your carport design includes trusses, assemble them according to the manufacturer’s instructions. The trusses provide additional support and stability to the roof. Typically, trusses are pre-engineered and arrive as individual components, requiring you to connect them using bolts or screws.
- Install the Bracing: Bracing adds further stability to the frame. Install the bracing according to the manufacturer’s instructions, ensuring it is properly connected to the posts and beams. The bracing helps to prevent the frame from swaying or collapsing.
- Secure the Frame: Once the frame is assembled, ensure it is securely anchored to the foundation. Use the provided anchor bolts and follow the manufacturer’s instructions for proper installation. This step is crucial for ensuring the carport’s stability and safety.
Installing the Roofing Panels
This section details the process of installing the roofing panels, ensuring they are securely fastened and sealed to protect your vehicle from the elements.
- Measure and Cut the Panels: Start by carefully measuring the roof area and cutting the roofing panels to size. Use a metal cutting saw or shears for precise cuts. Always wear appropriate safety gear when working with metal.
- Fasten the Panels: Once the panels are cut to size, fasten them to the frame using self-tapping screws. Follow the manufacturer’s instructions for the recommended screw size and spacing. Make sure the screws are driven in straight and flush with the panel surface.
- Seal the Panels: To ensure watertightness, seal the seams between the panels using a sealant designed for metal roofs. Apply the sealant liberally, ensuring it fills the gaps completely. Allow the sealant to dry completely before moving on to the next step.
Adding Optional Features
This section provides information on adding optional features to your carport, such as gutters, downspouts, and trim.
- Gutters and Downspouts: Gutters and downspouts help to manage rainwater runoff, preventing water damage to your carport and surrounding area. Install them according to the manufacturer’s instructions, ensuring they are properly secured and sloped to allow for efficient drainage.
- Trim: Trim can enhance the aesthetics of your carport and protect the edges of the roofing panels. Choose trim that is compatible with your roofing material and install it according to the manufacturer’s instructions.
Safety and Maintenance
Building a metal carport is a rewarding DIY project, but safety and maintenance are crucial for a successful and long-lasting structure. By prioritizing safety during construction and following regular maintenance practices, you can ensure your carport remains sturdy and protects your vehicles for years to come.
Safety Precautions
Safety is paramount during any construction project. Taking the necessary precautions will help prevent accidents and ensure a smooth construction process.
- Always wear appropriate safety gear, including safety glasses, gloves, and sturdy work boots. This protects your eyes, hands, and feet from potential hazards during construction.
- Use a ladder with a secure base and handrails for reaching heights. Ensure the ladder is properly positioned and secured before climbing.
- Never work alone, especially when lifting heavy materials. Have a helper available to assist with lifting and moving components.
- Be mindful of electrical wires and avoid working near power lines. Contact your local utility company if you need to relocate or disconnect any power lines.
- Always follow the manufacturer’s instructions for tools and equipment. This ensures you operate them safely and effectively.
- Keep the work area clean and free of debris to prevent tripping and falling hazards.
- Use caution when working with power tools, and always unplug them when not in use.
- Inspect all tools and equipment for damage before use. Replace or repair any damaged tools immediately.
Carport Maintenance
Regular maintenance is essential for extending the lifespan of your metal carport and preventing potential issues. A few simple steps can help keep your carport in top condition.
- Clean the carport regularly, removing any debris or leaves that may accumulate. This prevents corrosion and keeps the carport looking its best.
- Inspect the carport’s structure for any signs of damage, such as rust, dents, or loose bolts. Address any issues promptly to prevent further deterioration.
- Check the roof for leaks or damage, especially after heavy storms. Repair any leaks or damaged areas as soon as possible.
- Repaint the carport periodically to protect the metal from rust and corrosion. Choose a paint specifically designed for metal surfaces.
- Tighten any loose bolts or screws to ensure the carport remains structurally sound.
Cost Considerations
The cost of building a DIY metal carport can vary depending on several factors, including size, complexity, materials, and location. It’s crucial to have a realistic budget in mind before starting your project.
Estimated Cost Breakdown
A rough estimate for a standard 10′ x 20′ metal carport, excluding permits and labor, could be around $1,500 to $3,000. This estimate can vary significantly based on the specific features and materials chosen. Here’s a general breakdown of potential costs:
- Materials: Metal panels, framing, fasteners, concrete for foundation, and other miscellaneous items can range from $800 to $1,500.
- Tools: You’ll need basic tools like a tape measure, level, hammer, drill, and possibly a saw. If you don’t own these tools, you might need to rent or purchase them, adding around $100 to $300 to your budget.
- Permits: Depending on your local building codes, permits for construction could cost $50 to $200.
DIY vs. Hiring a Contractor
Building a metal carport yourself can save you significant money compared to hiring a professional contractor. While you’ll need to invest time and effort, the cost savings can be substantial.
- DIY: You’ll have full control over the project and can choose the materials and quality that fit your budget. The cost of a DIY metal carport can be significantly lower, potentially saving you 50% or more compared to hiring a contractor.
- Hiring a Contractor: A contractor will handle all aspects of the project, including materials, labor, and permits. While convenient, the cost can be significantly higher, potentially ranging from $3,000 to $8,000 or more depending on the complexity of the project and your location.
Factors Influencing Cost
Several factors can influence the overall cost of your DIY metal carport:
- Size: Larger carports naturally require more materials and labor, leading to higher costs.
- Complexity: Carports with additional features, such as enclosed sides or a roof overhang, will require more time and materials, increasing the overall cost.
- Materials: The type and quality of materials chosen can significantly impact the price. For example, using higher-grade metal panels or specialized fasteners will increase the cost.
- Location: Building codes and permit requirements can vary from location to location, affecting the overall cost.
Advantages of DIY Metal Carports
Building a DIY metal carport offers numerous advantages that can significantly benefit homeowners and property owners. From cost savings to increased property value, a DIY metal carport presents a practical and rewarding project.
Cost Savings
One of the most significant benefits of building a DIY metal carport is the potential for significant cost savings. Compared to hiring a contractor, taking on the project yourself allows you to control material costs and labor expenses. You can source materials from various suppliers, compare prices, and negotiate discounts, potentially saving hundreds or even thousands of dollars. Additionally, eliminating contractor fees and overhead costs further reduces the overall project expense.
Customization, Diy metal carport
DIY metal carports offer unparalleled customization options. You can tailor the design to your specific needs and preferences, choosing the size, shape, and features that best suit your property and requirements. This includes selecting the desired roof style, incorporating additional storage compartments, or even adding a side enclosure for a workshop or storage area.
Increased Property Value
A well-constructed metal carport can enhance the value of your property. By providing additional covered space for vehicles, recreational equipment, or outdoor activities, a carport adds functionality and appeal to your property. Potential buyers often view a carport as a valuable asset, especially in areas prone to harsh weather conditions.
Durability and Low Maintenance
Metal carports are known for their exceptional durability and low maintenance requirements. The sturdy metal frame resists corrosion, rust, and decay, ensuring long-lasting performance even in harsh weather conditions. Unlike wooden structures that require regular painting and maintenance, metal carports generally only need occasional cleaning to maintain their appearance.
Versatility
Metal carports are incredibly versatile structures that can be adapted for various uses beyond vehicle storage. They can be transformed into workshops, outdoor living spaces, covered patios, or even small storage sheds. This versatility makes metal carports an excellent investment for homeowners seeking to maximize their property’s functionality and value.
Tips for Success: Diy Metal Carport
Building a metal carport is a rewarding project, but it’s crucial to approach it with a well-defined plan, careful preparation, and a healthy dose of patience. This section will provide practical advice to help you navigate the challenges and ensure a successful DIY metal carport project.
Following Instructions
Following the manufacturer’s instructions is paramount. These instructions are tailored to the specific design and components of your carport, ensuring proper assembly and structural integrity.
- Read the instructions thoroughly before starting any work.
- Familiarize yourself with the assembly steps, diagrams, and safety precautions.
- Keep the instructions handy throughout the project, referring to them as needed.
Using Quality Materials
The quality of materials directly impacts the durability and longevity of your carport. Investing in high-quality materials will pay off in the long run.
- Choose galvanized steel for framing and roofing, as it resists corrosion and weathering.
- Ensure that the fasteners and connectors are made of durable materials and are compatible with the metal components.
- Select roofing panels with a high-quality coating that provides protection against UV rays and fading.
Seeking Help When Needed
Don’t hesitate to seek help if you encounter challenges or feel unsure about any aspect of the project.
- Consult with a professional contractor or experienced DIYer for guidance on complex tasks or unfamiliar techniques.
- Utilize online resources, forums, and DIY communities to connect with others who have built metal carports and seek their advice.
- If you’re working with heavy components or machinery, ensure you have adequate assistance to prevent accidents.
Documenting Progress
Documenting your progress is valuable for several reasons. It helps you keep track of your work, troubleshoot problems, and learn from your experience.
- Take photos or videos of each step of the construction process.
- Maintain a journal or log to record any decisions, modifications, or challenges you encounter.
- This documentation will be helpful for future reference and can even serve as a valuable resource for others who are considering building their own metal carports.
Building a DIY metal carport can be a fulfilling project that adds value to your property and provides a versatile space for your needs. By following the steps Artikeld in this guide, you can confidently construct a sturdy and durable carport that will serve you well for years to come. Remember to prioritize safety, utilize quality materials, and seek help when necessary. Enjoy the process and take pride in your accomplishment!
Building a DIY metal carport can be a great way to protect your vehicles from the elements, and you can even get creative with the design. If you’re feeling extra charitable, you could even build a DIY cat house for strays to provide shelter for those in need. After all, providing shelter for your furry friends can be just as rewarding as protecting your vehicles.