Google SketchUp Free: Dive into the world of 3D modeling without breaking the bank! This incredibly user-friendly program lets you create everything from simple shapes to complex architectural designs, all for free. We’ll explore its core features, from the basics of navigation to mastering advanced techniques like using components and applying textures. Get ready to unleash your inner architect, designer, or just plain creative genius.
Table of Contents
This guide will walk you through the ins and outs of Google SketchUp Free, covering everything from the fundamental tools and techniques to more advanced concepts like importing and exporting files, using plugins, and working with materials. We’ll also compare the free version to the paid options and explore the vast resources available to help you learn and grow as a SketchUp user.
Whether you’re a complete beginner or have some experience with 3D modeling, you’ll find something valuable here.
Software Overview
Google SketchUp Free, formerly known as SketchUp Free (and before that, SketchUp Mobile), is a surprisingly powerful and accessible 3D modeling tool available directly in your web browser. It’s perfect for quick designs, simple visualizations, and even more complex projects if you’re willing to put in the time. While it lacks some of the advanced features of its desktop counterpart, SketchUp Pro, it offers a robust foundation for anyone looking to dip their toes into the world of 3D modeling.SketchUp Free’s core functionalities revolve around intuitive modeling techniques.
You can easily create and manipulate shapes, add textures, and even incorporate simple animations. It’s designed with a user-friendly interface that prioritizes ease of use over overwhelming complexity. This makes it ideal for beginners, but it also offers enough depth to keep experienced users engaged.
Core Functionalities of Google SketchUp Free
SketchUp Free allows users to create 3D models using a variety of tools. These tools include basic shapes like cubes, cylinders, and spheres, which can be combined and manipulated to build more complex structures. Users can also employ push/pull functionality to extrude faces and create volumes, a key feature for quickly building 3D models. The program also supports the addition of textures and colors to enhance the visual appeal of the models.
Finally, simple measuring tools allow for precise model construction. For example, you could easily design a simple birdhouse by starting with a cube, then using the push/pull tool to create the walls and roof, and finally adding textures like wood grain.
Differences Between SketchUp Free and Paid Versions
The main difference between SketchUp Free and the paid versions (SketchUp Pro and SketchUp Studio) lies in the features and capabilities. SketchUp Free is limited in its rendering capabilities and lacks advanced modeling tools like advanced components, sophisticated animation tools, and extensive extension support. Pro and Studio versions offer far more robust features for professional-level work, including high-resolution rendering, advanced modeling techniques, and a vast library of extensions to extend its capabilities.
For example, SketchUp Pro includes features like LayOut for creating 2D documentation directly from your 3D model, something absent in the free version. Essentially, SketchUp Free is great for learning and smaller projects, while the paid versions are geared towards professional architectural, engineering, and design work.
User Interface and Navigation, Google sketchup free
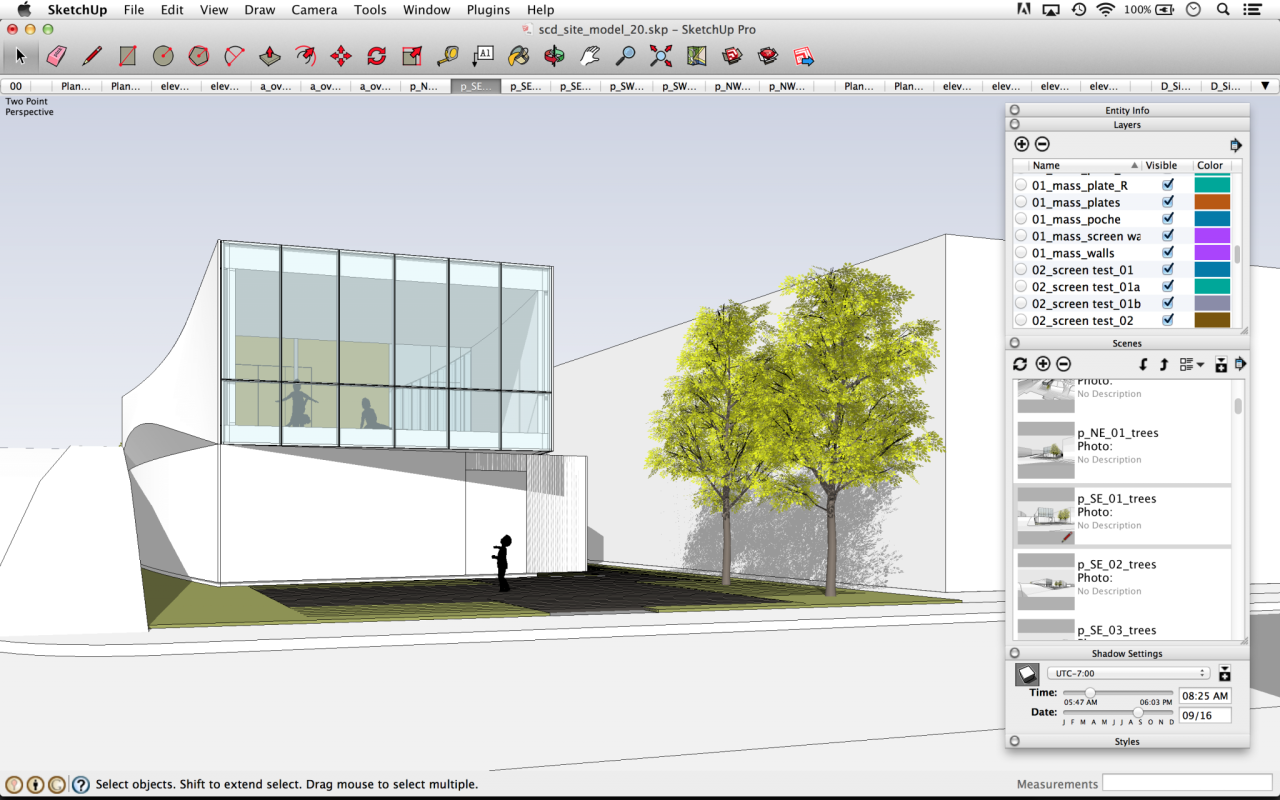
The SketchUp Free interface is remarkably clean and intuitive. The main window displays the 3D modeling area, with toolbars neatly organized along the edges. Navigation is straightforward, using standard keyboard shortcuts and mouse controls for panning, zooming, and rotating the model. A simple click-and-drag interface makes it easy to select, move, and modify objects. The overall design is minimalist, focusing on providing essential tools without overwhelming the user with unnecessary options.
The learning curve is relatively gentle, allowing users to quickly become familiar with the core functionalities.
Creating a Simple 3D Model: A Step-by-Step Guide
Let’s build a simple rectangular prism.
1. Start a new project
Open SketchUp Free in your browser and begin a new model.
2. Draw a rectangle
Use the rectangle tool (usually represented by a square icon) to draw the base of your prism. Click and drag to define the dimensions of your rectangle.
3. Extrude the rectangle
Select the rectangle. Then, use the “Push/Pull” tool (often a double-headed arrow) to pull the rectangle upwards, creating the height of your prism. Click and drag to set the desired height.
4. Add a texture (optional)
Select one of the faces of the prism and use the “Texture” tool to apply a texture from the available library or upload your own.
5. Save your model
Save your creation to your Google Drive.This simple process demonstrates the ease of use and core functionalities of SketchUp Free. From this basic prism, you can add further complexity and details to build much more elaborate models.
Modeling Techniques in SketchUp Free
SketchUp Free’s intuitive interface hides a surprisingly powerful set of modeling tools. Mastering these tools unlocks the ability to create incredibly detailed and complex 3D models, even on a tablet or phone. This section dives into the core techniques, providing practical examples and tips to boost your modeling efficiency.
SketchUp Free primarily relies on a few fundamental modeling techniques, each with its own strengths and weaknesses. Understanding these techniques is key to building anything from simple shapes to intricate architectural designs.
Push/Pull
Push/Pull is arguably the most important tool in SketchUp Free. It lets you extrude faces, essentially giving them depth. Imagine you have a square; using Push/Pull, you can “push” it outwards to create a cube, or “pull” it inwards to create a recessed area. This simple action is the foundation of many complex models. For instance, you can start with a simple rectangle, Push/Pull it to create a wall, then use Push/Pull again to add windows and doors.
The possibilities are virtually limitless, and the intuitive nature of the tool makes it easy to learn and master.
Offset
The Offset tool is used to create parallel lines or surfaces at a specified distance from an existing edge or face. This is incredibly useful for creating things like double-walled structures or adding details like trim around windows. Imagine you’ve drawn a rectangle representing a window frame. Using Offset, you can create a slightly larger rectangle to represent the exterior casing, quickly and accurately.
It saves considerable time compared to manually creating and positioning multiple lines.
Follow Me
Follow Me is a powerful tool for creating complex shapes by extruding a profile along a path. Imagine you want to create a curved railing. You would first draw the shape of a single railing section (the profile), then draw the path along which you want the railing to follow (a curve, for example). Using Follow Me, the profile is “copied” and extruded along the path, creating a complete, three-dimensional railing.
This tool is particularly useful for creating repetitive elements along curves or irregular shapes, significantly streamlining the modeling process.
Creating Complex Shapes Using Basic Tools
By combining Push/Pull, Offset, and Follow Me, you can build surprisingly intricate models. For example, to create a detailed building, you might start with simple rectangular walls (Push/Pull), then add window openings (Push/Pull and Offset), and finally, create a curved roof using Follow Me with a curved path and a rectangular profile. The key is to break down complex shapes into simpler components and build them up gradually.
Tips and Tricks for Efficient Modeling
Use Groups and Components
Organize your model by grouping related elements. This makes editing and manipulating parts of your model much easier.
Use Layers
Layers help keep your model organized and manageable, especially for large projects. Assign different elements to different layers (walls, windows, doors, etc.) for easy selection and manipulation.
Use the Protractor
The protractor tool ensures accurate angles, essential for precise modeling.
Use the Tape Measure
The tape measure tool allows for precise measurements and positioning of elements.
Learn Keyboard Shortcuts
Keyboard shortcuts significantly speed up your workflow.
Comparison of Modeling Techniques
| Technique | Shape | Efficiency | Difficulty |
|---|---|---|---|
| Push/Pull | Cube, Box, Wall | High | Low |
| Offset | Double-walled structure, Trim | High | Medium |
| Follow Me | Curved Railing, Spiral Staircase | Medium | Medium-High |
Working with Components and Groups
Okay, so you’ve got the hang of basic SketchUp Free modeling. Now let’s level up your workflow with components and groups. These are super handy tools for organizing your model and saving you tons of time, especially when you’re working on something complex. Think of them as your secret weapons for efficient and clean modeling.Components and groups are both ways to bundle together parts of your model, but they have key differences.
Groups are like containers – you can edit the contents individually after grouping them. Components, however, act like masters. Changes made to one instance of a component automatically update all other instances of that component. This is a game-changer when you have lots of identical objects.
Component and Group Creation and Editing
Creating components and groups is straightforward. Select the geometry you want to group or make into a component. Then, in the menu, you’ll find the options to “Group” or “Create Component.” Editing a group is simple; just double-click to enter the group’s editing mode. Editing a component is slightly different. Double-clicking will open the component for editing, but any changes you make will be reflected in all instances of that component.
To edit just one instance without affecting others, you’ll need to make a copy first, then edit the copy.
Using Components for Repetitive Elements
Let’s say you’re building a fence. Instead of drawing each fence post and rail individually, you can create a component for a single section of the fence. Once you’ve created your component, you can easily copy and paste it to build the entire fence quickly. This same principle applies to things like windows, roof tiles, or even entire furniture pieces.
So, you’re into Google SketchUp Free, that awesome 3D modeling program? It’s great for visualizing stuff, but if you need to create super precise vector graphics for your project, you might want to check out adobe illustrator free for the illustrations. Then, once you’ve got those polished vector images, you can easily import them back into your Google SketchUp Free model for a killer final product!
The time savings is massive, especially on larger projects.
Building a House with Components: A Step-by-Step Guide
Imagine building a simple house. We’ll break it down into manageable components.
- Foundation: Create a component for the base of the house. This includes the slab or foundation walls. Think of this as your first building block.
- Walls: Create a component for a single wall section. This can include the wall itself, windows, and doors. Remember, you can easily adjust window and door placement within the component.
- Roof: Design a component for a section of the roof, considering its slope and overhang. This allows for easy replication along the entire roofline.
- Windows and Doors: Instead of creating individual windows and doors, make them into their own components. This ensures consistency throughout your model and makes it easy to update their design later.
- Assembly: Now, using the components you’ve created, assemble the house. Copy and paste the wall components to create all four walls. Place the roof components on top. Add your window and door components to the walls.
By using components in this way, you can easily modify the house’s design. Want a bigger house? Just add more wall components. Want different windows? Simply edit the window component, and all the windows in your model update automatically.
This approach ensures consistency and greatly simplifies the modeling process, even for a relatively complex structure like a house. It’s all about breaking down a big project into smaller, manageable, and reusable parts.
Materials and Textures in SketchUp Free

Giving your SketchUp models a realistic and visually appealing finish is all about mastering materials and textures. This section dives into how to apply them, find free resources, create custom ones, and ultimately, how they impact your model’s overall look. Let’s get started!Applying materials and textures is surprisingly intuitive in SketchUp Free. You essentially “paint” them onto your model’s faces.
Select the face(s) you want to texture, then navigate to the Materials panel. From there, you can browse the pre-loaded library, search for specific materials, or apply your own custom creations. The process is similar whether you’re working with a simple cube or a complex architectural model. The key is careful selection and precise application to achieve the desired effect.
Applying Materials and Textures
The Materials panel is your central hub for adding visual flair to your models. Think of it as a virtual paint palette, brimming with options ranging from simple colors to highly detailed textures like wood grain or brickwork. To apply a material, simply select the face(s) of your model, then click on the desired material in the panel.
The material will instantly “paint” onto the selected surface, transforming its appearance. Experiment with different materials to see how they interact with light and shadow, adding depth and realism to your designs. SketchUp Free offers a range of options to fine-tune the material’s appearance, such as adjusting its color, transparency, and shine. This level of control allows you to achieve very specific visual effects.
Resources for Free Textures Online
The internet is a treasure trove of free textures. Sites like CGTextures, Textures.com, and Free3D offer a vast library of high-resolution images suitable for use in SketchUp Free. These sites often categorize textures by material type (wood, stone, metal, etc.), making it easy to find what you need. Remember to always check the license agreement before using any texture to ensure you’re complying with the terms of use.
Downloading and importing these textures into SketchUp Free usually involves creating a new material and then specifying the image file as the texture.
Creating Custom Materials
Beyond using pre-made textures, SketchUp Free empowers you to create your own custom materials. This opens up a world of creative possibilities, allowing you to design unique materials perfectly tailored to your project’s aesthetic. You can start by creating a simple colored material, adjusting the color and shine properties to your liking. To create more complex materials, you can import your own high-resolution images as textures.
The process involves selecting “Create Material” in the Materials panel, giving it a name, and then importing your image file. This allows you to apply your own photos, digital paintings, or scans of real-world materials to your 3D models, resulting in highly personalized and realistic textures.
Impact of Materials on Visual Appearance
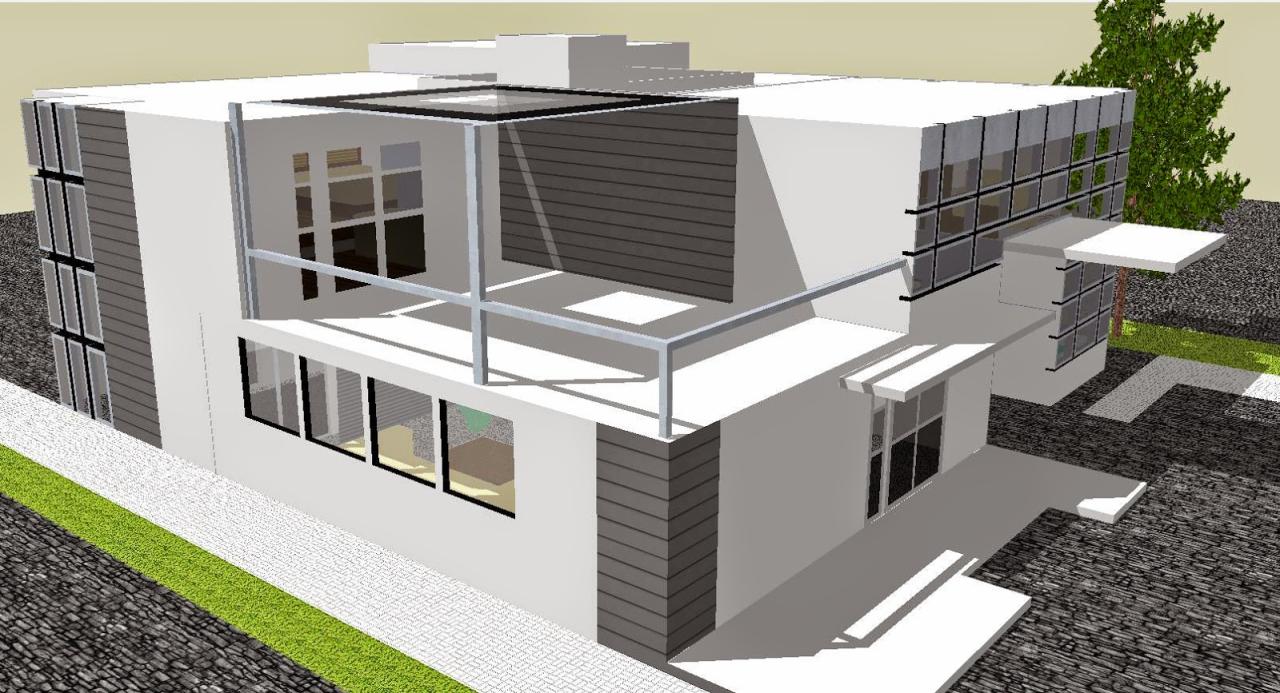
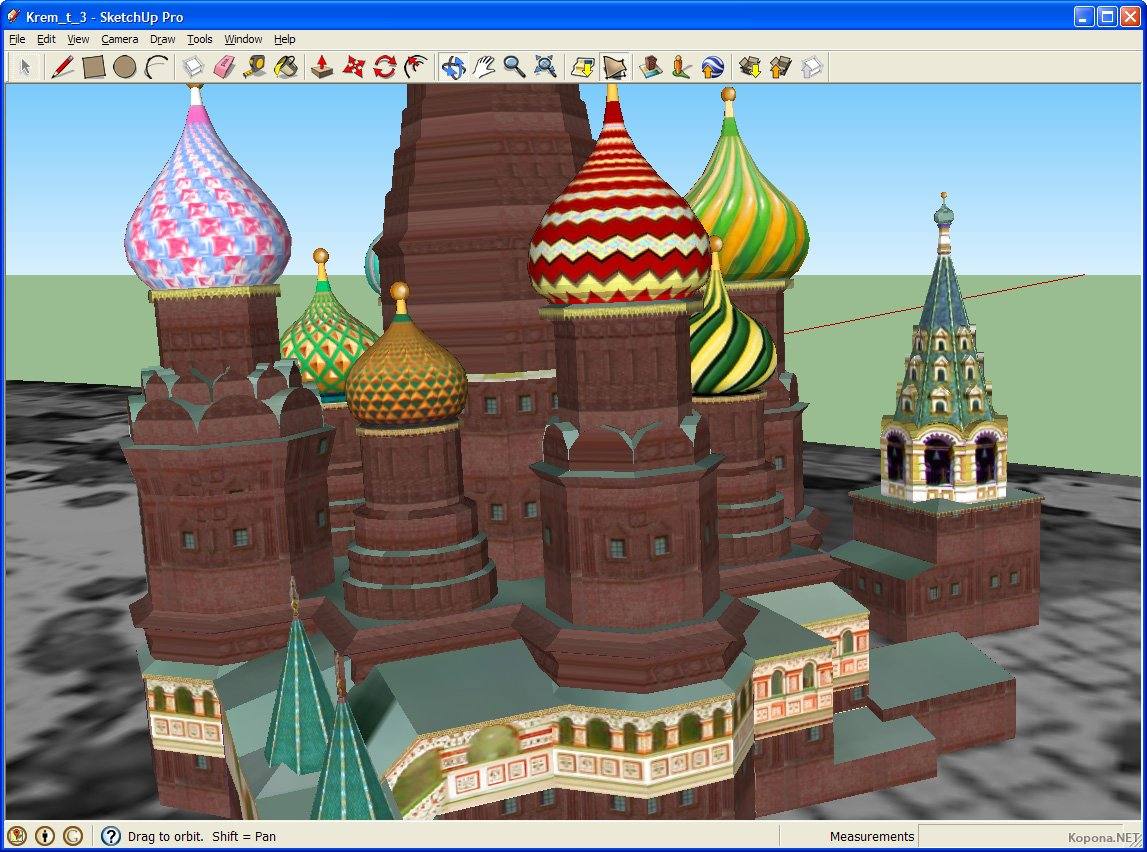
The choice of materials dramatically impacts a model’s visual appeal. A simple wooden house model rendered with a plain, untextured material will look quite different from one textured with realistic wood grain and subtle variations in color. Materials add depth, realism, and visual interest to a model. They can help to convey the texture and feel of different surfaces, influencing how the viewer perceives the overall design.
Consider a model of a modern glass skyscraper: using a highly reflective material for the glass panels will accurately depict the building’s sleek, modern aesthetic and the way it interacts with its environment. Conversely, using a dull, matte material would significantly alter the visual impression.
SketchUp Free for Specific Applications
SketchUp Free, despite its limitations compared to its paid counterpart, offers a surprisingly robust platform for various design applications. Its ease of use and accessibility make it a great starting point for beginners, while its features are sufficient for many professional tasks, particularly when combined with other software. This section explores its strengths and weaknesses across several key areas.
Architectural Visualization with SketchUp Free
SketchUp Free’s intuitive interface and simple modeling tools are well-suited for creating basic architectural visualizations. While it lacks the advanced rendering capabilities of professional software, users can create compelling visuals by utilizing the available materials and textures, along with external rendering solutions. For example, a student architect could quickly model a simple house, apply realistic materials like brick and wood, and then export the model to a program like Lumion for higher-quality rendering.
This workflow leverages SketchUp Free’s strength in quick modeling while relying on other software to enhance the final output. The simplicity of the interface allows for rapid iteration and experimentation with different design concepts.
Interior Design Applications of SketchUp Free
SketchUp Free proves useful for interior design projects, especially for initial space planning and client presentations. Its ability to easily import floor plans allows designers to quickly furnish a space, experiment with different layouts, and visualize the impact of furniture placement and material choices. A designer might use SketchUp Free to show a client different furniture arrangements in a living room, using the available library of models or importing their own.
The ease of modifying the model allows for real-time feedback and collaboration with clients, leading to a more efficient design process. While complex lighting simulations are beyond its capabilities, the basic lighting tools suffice for preliminary visual representations.
Product Design Using SketchUp Free
SketchUp Free is less ideal for complex product design requiring intricate details and precise engineering tolerances. However, it excels at quickly prototyping simple product designs and exploring various forms. A jewelry designer, for example, could quickly model a basic ring design, experiment with different shapes and sizes, and visualize the final product from various angles. The ability to easily manipulate shapes and add textures provides a rapid prototyping environment for initial concept development.
For more complex designs or manufacturing considerations, the model could be exported to CAD software for further refinement.
SketchUp Free Compared to Other Free 3D Modeling Software
SketchUp Free competes with other free options like Blender and Tinkercad. Blender, a powerful open-source program, offers a wider range of features and advanced capabilities, but has a significantly steeper learning curve. Tinkercad, on the other hand, is even simpler than SketchUp Free, focusing on intuitive, beginner-friendly design, but lacks the flexibility and modeling power. SketchUp Free occupies a middle ground, providing a balance between ease of use and sufficient features for many applications.
Its strength lies in its intuitive interface and the relative ease of learning the basic modeling techniques. The choice between these options depends on the user’s skill level, project requirements, and desired level of detail.
Importing and Exporting Files
So, you’ve built your awesome SketchUp Free model – now what? Getting your creation into other programs or ready for printing requires understanding how to import and export files. This section covers file formats, software compatibility, and tips for prepping your work for different outputs.
File Formats and Compatibility
SketchUp Free primarily uses the .skp file format for saving your work. This is SketchUp’s native format, offering the best compatibility for opening and editing your model within the SketchUp ecosystem. However, you can also import and export to other common formats to collaborate with others using different software or for specific purposes like 3D printing. Common import options include .dae (COLLADA), which is a widely supported 3D model format used in many animation and game development programs, and various image formats like .jpg and .png for 2D representations of your model.
Export options often include .dae, .fbx (Autodesk FBX), and .obj (Wavefront OBJ), providing flexibility for use in a wide range of applications. Remember that converting to other formats might result in some loss of detail or features, so always save a backup in the native .skp format.
Preparing Files for Printing and Rendering
Getting your model ready for printing or rendering depends on the specifics of your chosen method. For 3D printing, you’ll need to ensure your model is manifold (meaning all surfaces are properly connected and closed) and watertight (no gaps or holes). Many 3D printing software packages offer tools to check for these issues. Exporting as an .stl file is common for 3D printing, as this format is widely supported by 3D printers and slicing software.
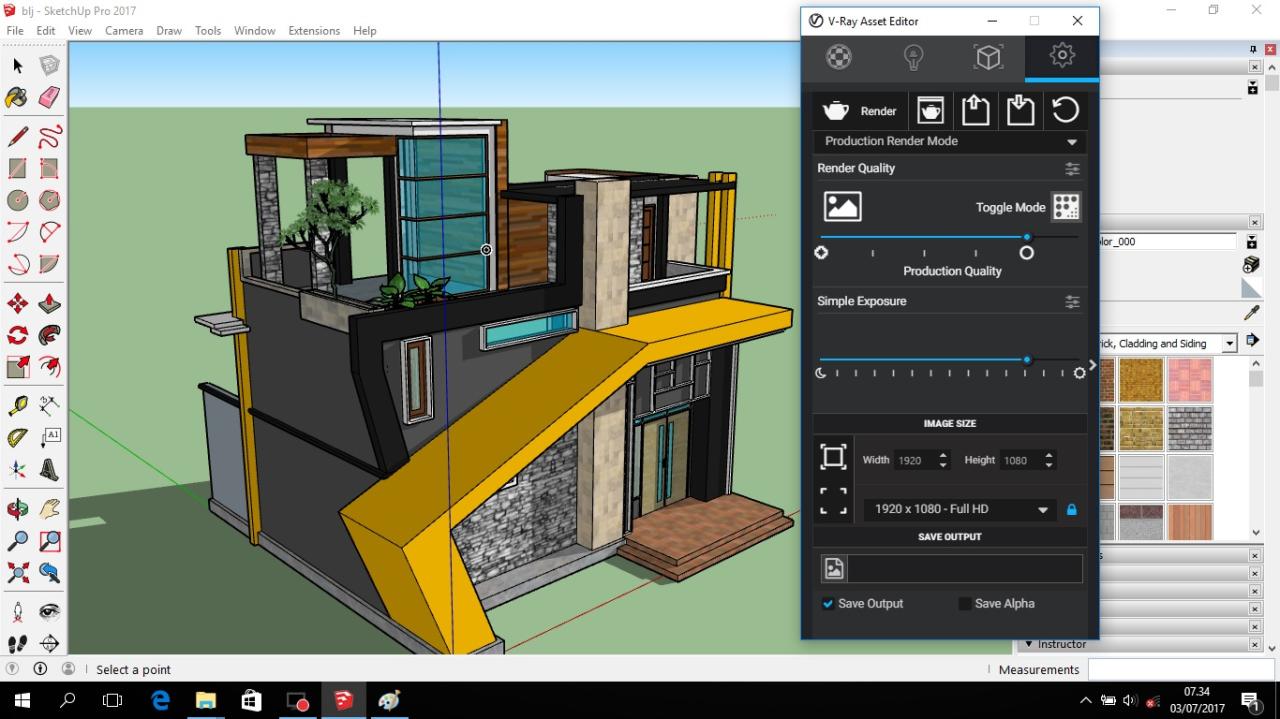
For rendering, exporting to a format like .fbx or .obj is generally suitable, allowing you to import your model into rendering software such as V-Ray or Lumion. High-resolution textures are crucial for photorealistic renders. Consider simplifying your model’s geometry if you’re encountering performance issues during rendering. A complex model with millions of polygons will take considerably longer to render than a simplified version.
For instance, if you are rendering a highly detailed building model for a presentation, you might choose to reduce the level of detail on smaller features like window frames for improved render times without significantly impacting the overall visual appeal.
Troubleshooting Import/Export Issues
Occasionally, you might run into problems importing or exporting files. A common issue is file corruption. If a file won’t open, try saving a copy of your .skp file before attempting to export it to another format. If the problem persists, try creating a new model and importing the problematic parts piecemeal. This can sometimes help isolate the corrupted elements.
Incompatibility issues can also arise. Always check the documentation of your target software to ensure it supports the file format you’re trying to import or export. For instance, some older rendering software might not support the latest .fbx versions. If you’re experiencing unexpected results, ensure your units are consistent throughout your model and in the target software.
Using different units (e.g., millimeters in SketchUp and inches in the rendering software) can lead to significant scaling issues. Finally, very large files can cause problems. If you’re working with a massive model, consider simplifying it or breaking it down into smaller, more manageable components before exporting. This can significantly reduce processing time and prevent potential errors.
Plugins and Extensions for SketchUp Free
SketchUp Free, while powerful on its own, can be significantly boosted by plugins and extensions. These add-ons provide extra functionality, streamlining workflows and enabling features not built into the core application. While the selection isn’t as vast as for the desktop version of SketchUp, several useful plugins are available, greatly enhancing the user experience and capabilities of SketchUp Free’s modeling environment.The availability of plugins and extensions for SketchUp Free is somewhat limited compared to its desktop counterpart.
This is primarily due to the platform differences and the limitations inherent in a web-based application. However, the plugins thatare* available often address common needs and frustrations, improving efficiency and expanding creative options. These extensions often focus on tasks like importing specific file types, adding specialized tools, or enhancing visualization capabilities.
Plugin Availability and Usefulness
The usefulness of plugins hinges on the individual user’s needs and workflow. For example, a plugin that simplifies the creation of specific architectural elements might be invaluable to an architect, but less relevant to someone designing furniture. Therefore, researching available plugins and evaluating their relevance to your project is crucial before installation. Many plugins offer free trials or limited functionality versions, allowing users to test compatibility and usefulness before committing.
Popular Plugins Enhancing SketchUp Free Functionality
Unfortunately, a definitive list of “popular” plugins for SketchUp Free is difficult to compile due to the lack of a centralized, widely-used plugin repository. SketchUp Free’s plugin ecosystem is less developed than its desktop sibling. The functionality offered by extensions is often integrated directly into the application itself, or addressed through workarounds and alternative methods. However, some third-party tools and services can indirectly enhance the SketchUp Free workflow, like cloud-based storage for models or external rendering software.
Installing and Using Plugins for SketchUp Free
The installation process for SketchUp Free plugins is not a straightforward plugin download and install like in desktop versions. Many features that would be plugins in the desktop version are either integrated into the online version or are achieved through external applications or web services. For example, advanced rendering capabilities might require exporting the model to a separate rendering program rather than using a SketchUp Free plugin.
The focus is on maintaining a streamlined, browser-based experience, prioritizing ease of access over extensive plugin management.
Comparison of Plugin Features
Given the limited number of dedicated SketchUp Free plugins, a direct feature comparison is challenging. The primary method of expanding SketchUp Free’s capabilities relies on integrating it with other web-based services or desktop software. For example, a user might export their SketchUp Free model in a compatible format (like FBX or OBJ) to use with a powerful external rendering program like Blender or Lumion.
This indirect method effectively achieves the same result as a dedicated plugin, albeit with an extra step. The choice depends on the user’s preference for a completely integrated versus a more modular workflow.
Limitations of Google SketchUp Free
Okay, so you’ve gotten a taste of SketchUp Free’s awesomeness, but let’s be real – it’s thefree* version. That means there are some trade-offs compared to the paid, pro version. This isn’t to say SketchUp Free is useless; far from it! But understanding its limitations will help you decide if it’s the right tool for your project and manage your expectations.
Feature and Functionality Differences
The biggest differences between SketchUp Free and SketchUp Pro boil down to features and capabilities. SketchUp Pro boasts a significantly larger toolbox, including advanced modeling tools, extensions support, and more robust rendering capabilities. Free users are restricted in the types of models they can create and the complexity they can achieve. This often translates to limitations in the precision and control available during the modeling process.
For example, Pro offers tools for creating complex curves and surfaces that simply aren’t available in the free version. Think of it like comparing a basic bicycle to a high-performance racing bike – both get you where you’re going, but the latter offers far greater control and speed.
Workarounds for Limitations
While SketchUp Free lacks some of the bells and whistles of the pro version, there are ways to work around some of its limitations. For instance, the lack of advanced modeling tools might require you to break down complex shapes into simpler components. Similarly, limitations in rendering can be compensated for by exporting your model to other software for post-processing.
The key is understanding the limitations and finding creative solutions to overcome them. It’s all about working smarter, not harder (or, at least, harder
within* the constraints).
Specific Limitations and Workarounds
Let’s get specific. Here’s a list of common limitations in SketchUp Free and some practical workarounds:
- Limitation: Limited extension support. Workaround: Rely on built-in tools and simpler modeling techniques. Consider using external software for tasks that require specialized plugins.
- Limitation: Smaller model file size limits. Workaround: Break down large projects into smaller, manageable files. Optimize your models by removing unnecessary geometry.
- Limitation: Less advanced rendering capabilities. Workaround: Export your model to a different program like Blender or Lumion for more sophisticated rendering and visualization.
- Limitation: Fewer modeling tools. Workaround: Employ creative modeling strategies to achieve desired results using the available tools. Sometimes, a slightly different approach can produce the same outcome.
- Limitation: No LayOut integration. Workaround: Use a separate drawing program to create presentation drawings from your SketchUp model exports. Alternatively, export as an image and use a presentation tool.
Learning Resources for SketchUp Free: Google Sketchup Free
So, you’re ready to dive into the world of 3D modeling with SketchUp Free? Awesome! Finding the right learning resources can make all the difference between frustration and a fun, productive experience. This section will guide you to various learning paths, from beginner-friendly tutorials to advanced techniques, helping you find the perfect fit for your learning style and goals.
We’ll explore different types of resources and suggest some excellent starting points.
Types of Learning Resources
There’s a whole buffet of learning options available for SketchUp Free. You can choose from video tutorials, written guides, online courses, and even interactive exercises. Each method caters to different learning preferences. Visual learners might thrive with video tutorials, while those who prefer a more structured approach might benefit from online courses. Written guides can be great for quick reference, and interactive exercises provide hands-on experience.
The key is to find what works best for you and to experiment with different methods to maximize your learning.
Beginner-Friendly Resources
Starting with the basics is crucial. Several resources are specifically designed to guide beginners through the fundamental concepts and tools of SketchUp Free. These often focus on the user interface, basic drawing tools, navigation, and simple modeling projects. A good starting point is the official SketchUp website itself; their help section and tutorials provide a solid foundation.
Many YouTube channels offer excellent introductory series, often breaking down complex concepts into easily digestible segments. Look for channels that emphasize visual learning and clear explanations, as these can significantly improve your understanding. Many of these free introductory courses focus on creating simple models, like boxes, chairs, or basic houses. This allows you to get comfortable with the interface and basic commands before tackling more complex projects.
Intermediate and Advanced Resources
Once you’ve mastered the fundamentals, you’ll want to explore more advanced techniques. These might include working with components and groups, utilizing extensions, mastering complex modeling workflows, or creating photorealistic renderings. For this level, online courses, often found on platforms like Udemy or Skillshare, can be incredibly beneficial. These courses typically provide structured learning paths, project-based assignments, and opportunities for interaction with instructors and fellow students.
You’ll find resources focusing on specific applications, such as architectural modeling, interior design, or product design. These specialized courses will dive deep into the techniques and workflows relevant to your chosen field. Furthermore, searching for tutorials focused on specific SketchUp features or modeling techniques will provide targeted learning experiences. For example, a search for “SketchUp Free component modeling” or “SketchUp Free advanced materials” will yield many relevant tutorials.
Specific Resource Examples
While specific links can become outdated, searching for terms like “SketchUp Free tutorial for beginners,” “SketchUp Free architectural modeling,” or “SketchUp Free YouTube tutorial” will yield numerous results. Remember to check the upload date and the number of views to gauge the quality and relevance of a tutorial. The official SketchUp website’s help section and support forums are also invaluable resources.
The community aspect of these platforms allows you to connect with other users, ask questions, and find solutions to common problems.
Community and Support for SketchUp Free
SketchUp Free, while a powerful and intuitive 3D modeling tool, benefits immensely from a vibrant and supportive online community. Navigating the software, overcoming specific challenges, and discovering new techniques are all significantly easier with the help of experienced users and the wealth of resources available online. This section explores the various avenues for finding support and engaging with the SketchUp Free community.
Finding Support and Assistance
Several avenues exist for getting help with SketchUp Free. The official SketchUp website offers a comprehensive help center with FAQs, tutorials, and troubleshooting guides. These resources cover a wide range of topics, from basic interface navigation to advanced modeling techniques. Beyond the official support, numerous user-created tutorials and walkthroughs can be found on platforms like YouTube. These videos often provide practical, step-by-step guidance on specific tasks, offering a different perspective than the official documentation.
Finally, actively engaging with the SketchUp community forums allows users to ask questions, share their experiences, and learn from others facing similar challenges.
SketchUp Community Forums and Online Resources
The SketchUp community is a valuable resource for users of all skill levels. The official SketchUp forum is a central hub for discussions, questions, and answers. Users can post questions about specific issues they are encountering, share their projects, and seek feedback from other users. The forum is moderated to ensure a positive and helpful environment. Many unofficial communities also exist, often focused on specific aspects of SketchUp or particular industries that utilize the software.
These smaller, more specialized communities can provide focused support and allow users to connect with others who share their interests and expertise. Searching for “SketchUp Free forum” or “SketchUp Free community” on a search engine like Google will yield numerous results, connecting you to these valuable resources. Remember to always be cautious and evaluate the credibility of information found on unofficial platforms.
Benefits of Participating in Online Communities
Participating in the SketchUp Free community offers numerous benefits. First, it’s a direct line to troubleshooting assistance. When faced with a particularly stubborn problem, posting a question to the forum can often yield quick and effective solutions from experienced users. Second, community engagement fosters a sense of collaboration and learning. Sharing your projects and techniques allows you to receive feedback, improve your skills, and learn from the successes and failures of others.
Finally, networking within the community can lead to valuable professional connections and collaborations. This is particularly beneficial for those using SketchUp Free for professional purposes. Active participation in these communities can significantly enhance your SketchUp Free experience.
Creating a Simple Project from Start to Finish
Let’s build a simple, modern bookshelf using SketchUp Free. This walkthrough will cover the process from initial design to the final model, highlighting key SketchUp Free features along the way. We’ll focus on efficiency and clarity, making this a project even beginners can easily follow.
Project Design and Initial Setup
We’ll create a bookshelf approximately 36 inches wide, 12 inches deep, and 48 inches tall. This size is manageable for a SketchUp Free project and provides ample space for books. We’ll use a minimalist design with clean lines and simple geometry, focusing on the fundamental tools of SketchUp. We start by opening SketchUp Free and creating a new project.
The initial interface is straightforward; we’ll begin by setting up our working axes and units (inches, in this case).
Drawing the Basic Structure
The first step is to draw the main frame of the bookshelf. Using the Line tool, we create a rectangle representing the base of the bookshelf. We then use the Push/Pull tool to give this rectangle height, creating the first vertical support. We repeat this process to create the other three vertical supports, ensuring that all measurements are precise and consistent.
The resulting structure is a simple rectangular box. This is the core of our bookshelf.
Adding Shelves
Next, we’ll add the shelves. We create rectangles representing the dimensions of each shelf, using the Line tool and carefully measuring to ensure they fit neatly within the frame. We then use the Push/Pull tool again to give these rectangles depth, creating the actual shelves. It’s important to align these shelves evenly using the on-screen measurement tools to ensure a clean, professional look.
We’ll create three shelves for our bookshelf.
Adding Detail and Refinement
Now, let’s add some small details. We can use the Line tool to add small rectangular blocks to the top and bottom of the vertical supports, simulating a more robust construction. We can also use the Offset tool to create small inner recesses within the larger rectangles for a more visually interesting design. This step demonstrates how simple changes can improve the aesthetic appeal.
Material Application
To make the bookshelf look more realistic, we’ll apply materials. SketchUp Free offers a variety of pre-loaded materials. We’ll select a light oak wood texture for the shelves and a slightly darker oak for the frame. Applying materials is a simple drag-and-drop process within the SketchUp Free interface. This immediately elevates the visual appeal of our simple bookshelf design.
Final Touches and Export
Finally, we’ll make any last adjustments, ensuring that all dimensions and alignment are correct. Then, we’ll export the finished model as a .skp file for easy sharing or further editing. SketchUp Free offers various export options, allowing us to choose the appropriate file format based on our needs. The export process is simple and straightforward, taking only a few seconds.
Last Point
So, there you have it – a comprehensive look at Google SketchUp Free! From its intuitive interface to its surprisingly powerful capabilities, SketchUp Free empowers anyone to explore the exciting world of 3D modeling. Whether you’re visualizing a dream home, designing a new product, or just exploring your creative side, this free tool provides a fantastic starting point.
Don’t be afraid to experiment, learn from the community, and most importantly, have fun creating!
Answers to Common Questions
Can I use SketchUp Free on a tablet or phone?
Yes! SketchUp Free is available as a web application, so you can use it on any device with a web browser.
What file formats can I import and export?
SketchUp Free supports several common formats, including .SKP (SketchUp’s native format), .DAE (Collada), and image formats like .PNG and .JPG. The exact options may vary slightly depending on the version.
Are there any limitations on model size in the free version?
Yes, there are limits on file size and the complexity of models you can create in the free version. Large or highly detailed models might encounter performance issues or be impossible to save.
How do I get help if I’m stuck?
The SketchUp community forums are a great resource! You can also find many helpful tutorials on YouTube and other online platforms.
Is there a way to collaborate on projects using SketchUp Free?
While not a direct built-in feature, you can share your .SKP files with collaborators, who can then open and work on them independently. More robust collaboration features are available in the paid versions.