Autodesk Recap isn’t just software; it’s a total game-changer for turning messy point cloud data into awesome 3D models. Think of it as the ultimate digital archaeologist’s tool, letting you resurrect buildings, landscapes, or even ancient artifacts from a cloud of points. We’re diving deep into how it works, from importing scans to creating polished models ready for BIM integration or whatever wild project you’ve got cooking.
Table of Contents
This guide covers everything from the basics of Recap Pro and Recap Photo to advanced techniques like meshing and point cloud manipulation. We’ll explore how Recap integrates with other Autodesk software like Revit, and even look at how different industries—from construction to archaeology—leverage its power. Get ready to level up your 3D modeling skills!
Autodesk Recap Features
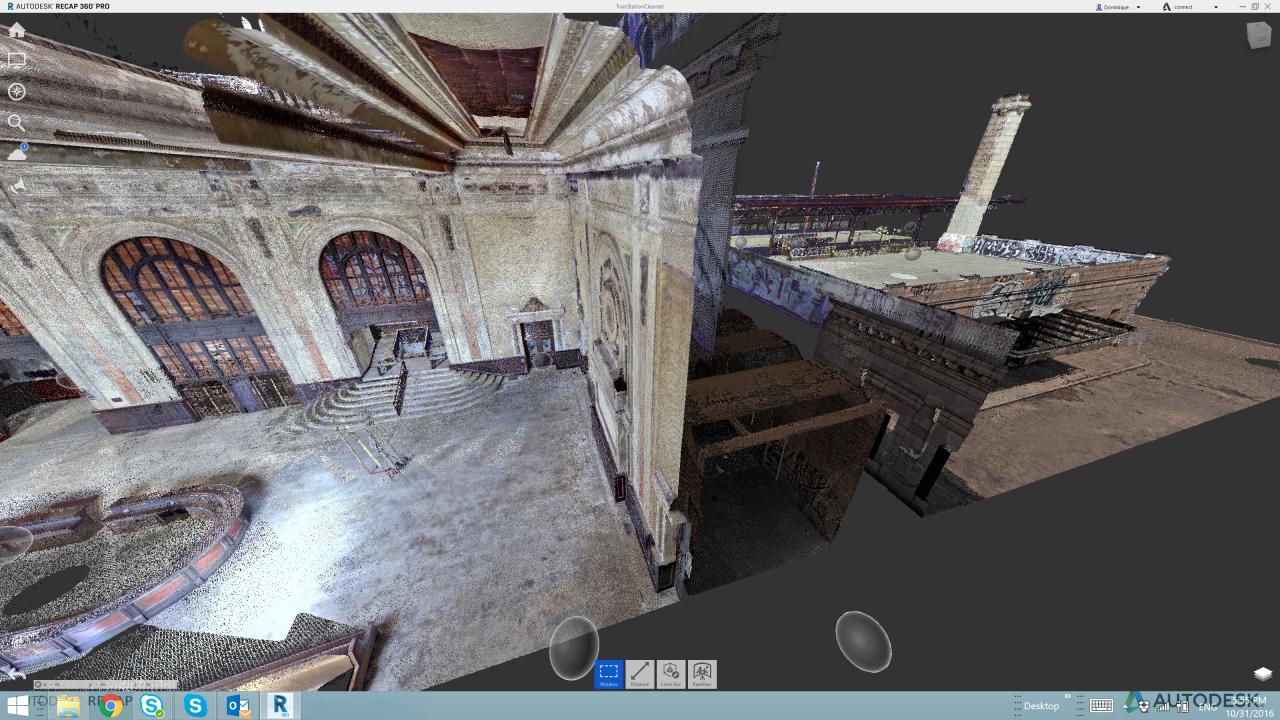
Autodesk Recap is a powerful software suite for processing point cloud data, transforming raw laser scan data into usable 3D models for various applications in architecture, engineering, and construction (AEC). It offers a range of tools for cleaning, processing, and visualizing point clouds, making it a valuable asset for professionals needing accurate 3D representations of real-world environments.Recap’s core functionality centers around importing, processing, and exporting point cloud data.
This involves tasks like noise reduction, registration (aligning multiple scans), mesh generation, and the creation of 3D models. The software also allows for the integration of other data types, such as images and CAD models, facilitating a more comprehensive and detailed understanding of the project. Beyond the core functionalities, Recap offers features like automated feature extraction, allowing for quick identification of key elements within the point cloud, simplifying the overall workflow.
Recap Pro vs. Recap Photo
Recap Pro and Recap Photo are two distinct offerings within the Autodesk Recap family, catering to different needs and workflows. Recap Pro is the more comprehensive solution, designed for handling large and complex point cloud datasets acquired from various sources, including terrestrial laser scanners and drones. It boasts advanced processing capabilities, such as automated registration, noise filtering, and the generation of high-quality meshes and models.
In contrast, Recap Photo focuses on photogrammetry, utilizing overlapping photographs to create 3D models. While less powerful in terms of raw point cloud processing, Recap Photo offers a user-friendly interface and is ideal for projects where detailed point cloud data isn’t a primary requirement, such as creating quick 3D models from a set of photos. The choice between the two depends on the project’s specific requirements and the type of input data available.
Processing Point Cloud Data in Recap
The workflow for processing point cloud data in Recap typically involves several key steps. First, the raw point cloud data is imported into the software. This data, often in formats like .las or .xyz, represents a massive collection of 3D points. Next, the data undergoes a cleaning process, removing noise and outliers to improve the accuracy and efficiency of subsequent steps.
This might involve filtering based on intensity or distance. Then, if multiple scans are involved, the registration process aligns these scans into a unified coordinate system. This step is crucial for creating a complete and accurate 3D model. Following registration, users can generate a mesh from the point cloud, converting the raw point data into a surface representation.
Finally, the processed data can be exported in various formats, suitable for use in other software applications like AutoCAD or Revit. The entire process can be significantly automated using Recap’s various tools and features.
Recap Compared to Other Point Cloud Software
Autodesk Recap competes with other point cloud processing software such as RealityCapture, CloudCompare, and Meshroom. While all these programs share the fundamental goal of processing point cloud data, they differ in features, usability, and pricing. Recap stands out for its tight integration within the Autodesk ecosystem, allowing seamless workflows with other Autodesk products like Revit and AutoCAD. Some competitors, like RealityCapture, might offer more advanced photogrammetry features, while others, like CloudCompare, are known for their open-source nature and flexibility.
The best choice depends on the specific needs of the user, considering factors such as budget, required features, and the user’s familiarity with different software interfaces and workflows. For instance, a large AEC firm already heavily invested in the Autodesk ecosystem might find Recap’s integration benefits outweigh those of a standalone, potentially more feature-rich competitor.
Recap Data Import and Export
Okay, so you’ve got your point clouds, you’ve explored Recap’s features – now let’s talk about getting your data in and out. Efficient data import and export is key to a smooth workflow, especially when you’re working with multiple software packages. This section will cover the ins and outs of importing various file types, exporting your processed data, and integrating Recap into your larger project pipeline.
Import File Formats, Autodesk recap
Recap supports a variety of file formats, each with its own strengths and quirks. Understanding these nuances is crucial for a successful import. Generally, the process involves navigating to the “Import” function within Recap, selecting your file type, and specifying any necessary parameters. However, the specifics can vary.
- Point Cloud Data: Formats like .rcs (ReCap’s native format), .las (LASer scan files), and .xyz (simple X, Y, Z coordinate files) are commonly used for point cloud data. .rcs files are ideal for retaining all project information within the Recap environment. .las files are industry standard and widely compatible. .xyz files are simple but lack metadata.
- Raster Images: Recap can import various image formats like .jpg, .tif, and .png to create textured meshes or for georeferencing. High-resolution images are generally preferred for better mesh quality. Image alignment and georeferencing parameters will need to be carefully considered during import.
- CAD Data: Importing CAD data, such as .dwg or .dxf files, allows for overlaying design models onto point cloud data for comparison and analysis. Accurate alignment of the CAD model to the point cloud is essential for meaningful results. This often requires careful manual adjustment.
Export Methods
Once you’ve processed your data in Recap, exporting it in a suitable format is crucial for sharing or using it in other software. Recap offers a range of export options to cater to different downstream applications.
- OBJ: A widely used 3D model format, OBJ is a good choice for exporting meshes for use in 3D modeling software like 3ds Max or Maya. OBJ files typically preserve geometry but not material information.
- FBX: Another common 3D model format, FBX is known for its better handling of animation and materials compared to OBJ. It’s a good choice for transferring models between different 3D software packages, often retaining more detail than OBJ.
- IFC: Industry Foundation Classes (IFC) are commonly used in Building Information Modeling (BIM). Exporting to IFC allows for integration with BIM software like Revit, preserving crucial information for collaborative workflows.
Import/Export Limitations
While Recap offers versatile import/export capabilities, some limitations exist. For example, very large point clouds can become unwieldy during import and export, potentially leading to processing delays or even crashes. Furthermore, certain metadata or detailed information might not always be perfectly translated between formats, potentially leading to data loss. The complexity of the model and the chosen format significantly impact export time and file size.
For instance, exporting a highly detailed mesh as an FBX file will result in a larger file size and longer processing time compared to exporting a simplified mesh as an OBJ file.
Workflow for Data Transfer
A typical workflow might involve importing a point cloud (.las or .rcs), processing it in Recap (alignment, mesh creation, etc.), and then exporting the resulting mesh as an FBX file for use in Autodesk 3ds Max for visualization or further refinement. Alternatively, if working within a BIM context, the mesh might be exported as an IFC file for integration into Revit.
The key is to select the appropriate import and export formats to minimize data loss and maximize interoperability.
Point Cloud Manipulation in Recap: Autodesk Recap

Okay, so you’ve got your point cloud data imported into Autodesk Recap – congrats! Now the real fun begins: making sense of it all. This section dives into cleaning up messy scans, aligning multiple scans for a complete model, and extracting useful information through sections and views. Think of it as sculpting your digital reality.
Cleaning and Filtering Noisy Point Cloud Data
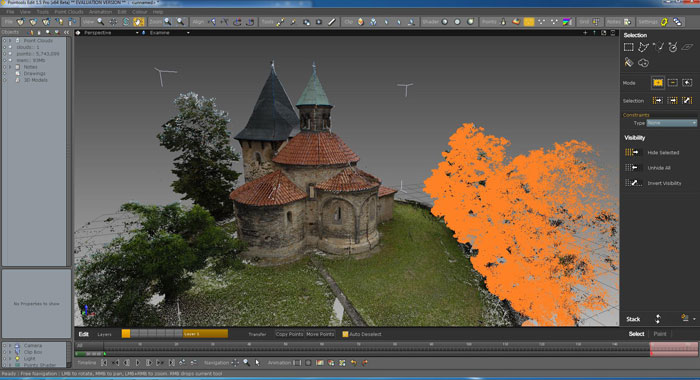
Cleaning up your point cloud is crucial for accurate measurements and model creation. Noisy data – points that are inaccurate or irrelevant – can skew your results. Recap offers several tools to tackle this. The most common methods involve filtering by noise level, removing points based on their deviation from surrounding points, and using classification tools to identify and remove specific types of noise (like ground points or vegetation).
You can adjust parameters like the distance threshold for outlier removal or the intensity threshold for filtering based on point intensity. For instance, you might remove points with low intensity, which could represent shadows or areas of poor scan coverage. Careful parameter adjustment is key; you don’t want to remove too much data, leading to an incomplete model, but you also don’t want to leave too much noise, causing inaccuracies.
Aligning Multiple Point Cloud Scans
Multiple scans are often necessary to capture a complete model, especially for large projects. Alignment is the process of merging these individual scans into a single, coherent point cloud. Recap employs sophisticated algorithms to match overlapping regions between scans, automatically determining the spatial relationship between them. The software uses features like common points or planes in the overlapping areas.
However, sometimes manual adjustments are needed, particularly when overlap is minimal or scan quality is poor. In these situations, you might need to manually select corresponding points in different scans to guide the alignment process. Think of it like fitting puzzle pieces together – sometimes it’s easy, and sometimes it requires a bit of finesse.
Creating Sections and Views from Point Cloud Data
Once your point cloud is clean and aligned, you can create sections and views to analyze specific areas of interest. Sections are essentially slices through the point cloud, revealing the internal structure. Views are perspectives or snapshots of the point cloud, useful for visualization and presentation. Recap allows you to easily create these by defining planes or selecting specific areas.
For example, you might create a section to visualize the internal structure of a building or a view to showcase a specific detail of a scanned object. This step is critical for extracting meaningful information from the dense point cloud data and communicating your findings effectively.
Comparison of Point Cloud Filtering Methods
| Method | Description | Pros | Cons |
|---|---|---|---|
| Noise Level Filtering | Removes points based on their deviation from a calculated average. | Simple, fast | Can remove valid points if the noise level is not set appropriately. |
| Intensity Filtering | Removes points based on their intensity values (reflectance). | Effective for removing low-intensity points (shadows). | May require adjustments depending on scan conditions. |
| Statistical Outlier Removal | Removes points that statistically differ significantly from their neighbors. | Robust to various types of noise. | Computationally intensive. |
| Classification-based Filtering | Removes points based on pre-defined classifications (e.g., ground, vegetation). | Precise removal of specific types of noise. | Requires manual classification or advanced algorithms. |
Creating Models from Recap Data
Okay, so you’ve got your point cloud data in Recap – awesome! Now the fun part: turning that massive collection of points into actual 3D models. This is where you bring your project to life, creating something tangible from what was previously just a digital soup of points. Think of it like sculpting a statue from a pile of clay – except your clay is millions of points and your tools are Recap’s powerful meshing algorithms.Generating 3D models from point cloud data in Recap involves several key steps.
Autodesk Recap is awesome for turning point clouds into usable models, saving tons of time on manual measurements. But to really maximize its potential, you need a solid strategy for managing leads and projects – that’s where effective crm marketing comes in. A good CRM helps you track client interactions and project progress, ensuring you get the most out of your Autodesk Recap workflow and keep those projects flowing smoothly.
First, you’ll need to define the area you want to model, often by selecting a specific region within the point cloud. Then, you’ll choose a meshing algorithm and set parameters like mesh density and surface smoothing. Finally, you’ll process the data, letting Recap do its magic to create a surface representation of your point cloud. The resulting model can then be exported in various formats for use in other software or for 3D printing.
Meshing Methods in Recap
Recap offers a range of meshing algorithms, each with its own strengths and weaknesses. The choice of algorithm depends heavily on the specific needs of the project, such as the desired level of detail, the complexity of the geometry, and the available processing power. Generally, you’ll find a balance between accuracy and efficiency is key.
Meshing Algorithms: A Comparison
The accuracy and efficiency of different meshing techniques vary significantly. Here’s a comparison of some common methods:
| Meshing Algorithm | Accuracy | Efficiency | Notes |
|---|---|---|---|
| Poisson Surface Reconstruction | High | Moderate | Excellent for smooth surfaces; can struggle with highly detailed or noisy data. Often produces a watertight mesh. |
| Delaunay Triangulation | Moderate | High | Fast and efficient, but can produce a less smooth surface, particularly in areas with sparse data. May not always create a watertight mesh. |
| MeshLab’s Screened Poisson | High | Moderate to Low | Similar to Poisson but incorporates a screening step to improve handling of noisy data. Can be computationally expensive for large datasets. |
| Ball Pivoting Algorithm | Moderate to High | Moderate | Good for noisy point clouds and complex geometries; creates a mesh by rolling a virtual ball across the point cloud. Speed depends on ball size. |
Recap and BIM Integration
Okay, so we’ve covered the basics of Recap – importing point clouds, manipulating them, and building models. Now let’s talk about how to seamlessly integrate all that awesome reality capture data into your BIM workflow. This is where things get really powerful, letting you leverage real-world conditions in your digital designs.Integrating Recap data into your BIM process basically bridges the gap between the as-built world and your planned design.
This means you’re working with accurate, real-world data, avoiding costly clashes and rework later on. Think of it as adding a super-accurate layer of reality to your virtual model.
Importing Recap Data into BIM Software
The process of importing Recap data is generally straightforward, though the specifics vary depending on the BIM software you’re using. For Revit, a common method is to import the Recap point cloud as a linked file. This allows you to maintain a connection to the original Recap project, ensuring that any updates in Recap automatically reflect in your Revit model.
Other BIM software packages have similar import options, often supporting various file formats like .rcp, .pts, or even directly importing from a Recap Pro project. The import process typically involves navigating to the import function within the software, selecting your Recap file, and choosing the appropriate settings for scaling and positioning within your BIM project. After the import is complete, the point cloud will appear within your BIM software, ready to be used as a reference model.
Examples of Recap Data Enhancing BIM Projects
Imagine you’re renovating an old building. A Recap scan provides an accurate as-built model, revealing hidden pipes, structural elements, or unexpected conditions. This prevents costly surprises during demolition or construction. Or consider a large-scale infrastructure project – using Recap to create a highly detailed point cloud of the existing terrain allows for precise modeling of roads, utilities, and other elements.
This minimizes errors and ensures efficient design coordination. In another example, a new building construction project can leverage a Recap scan of the site to ensure accurate modeling of the existing topography and to identify potential site constraints early on. This helps in avoiding costly redesign or delays during the construction phase.
Challenges and Best Practices for BIM Integration
While the integration of Recap data is incredibly beneficial, it’s not without its challenges. Large point cloud datasets can be computationally intensive, requiring powerful hardware to manage effectively. Proper data preparation, including cleaning and filtering the point cloud to remove noise or irrelevant data, is crucial for optimal performance. Additionally, aligning the Recap data accurately with the BIM model requires careful attention to detail and potentially the use of control points.
Best practices involve utilizing appropriate coordinate systems, establishing clear project standards for data handling, and coordinating effectively between the reality capture and BIM teams. Effective communication and collaboration between teams are paramount to successful integration. Think of it like a relay race – a smooth handoff between the Recap team and the BIM team is essential for a successful project outcome.
Recap in Different Industries
Autodesk Recap’s versatility extends far beyond the typical AEC (Architecture, Engineering, and Construction) realm. Its ability to process point cloud data makes it a valuable tool across a range of industries needing precise 3D representations of real-world objects and environments. This section explores Recap’s applications in various sectors, highlighting its advantages and disadvantages within each.
Recap in Architecture, Engineering, and Construction
Recap plays a crucial role in AEC by providing accurate as-built models. Architects use it to document existing structures for renovations or additions, ensuring designs seamlessly integrate with the existing building. Engineers leverage Recap’s point cloud data for detailed analysis of infrastructure, identifying potential structural issues or informing design modifications. Construction professionals use Recap to monitor progress, track changes, and create accurate quantity takeoffs, streamlining the entire construction lifecycle.
For instance, a bridge inspection might use Recap to create a 3D model of the bridge’s structure, highlighting areas of damage or deterioration that need repair. This detailed visualization aids in planning maintenance and repairs effectively and safely.
Recap in Surveying, Archaeology, and Manufacturing
Beyond AEC, Recap finds applications in diverse fields. Surveyors use Recap to generate highly accurate terrain models, essential for land development projects. Archaeologists utilize Recap to create detailed 3D records of excavation sites, preserving valuable historical information without disturbing the site. In manufacturing, Recap assists in reverse engineering, allowing companies to create digital models of existing parts for analysis, modification, or replication.
Imagine archaeologists using Recap to digitally reconstruct an ancient ruin, allowing for detailed analysis without physically disturbing the site. The resulting 3D model can be studied by researchers worldwide, preserving the site’s integrity.
Advantages and Disadvantages of Recap Across Sectors
While Recap offers significant advantages across industries, its applicability and effectiveness depend on the specific context. A key advantage is its ability to handle massive datasets, creating highly detailed 3D models. However, processing large point clouds can be computationally intensive, requiring powerful hardware. Another advantage is its ease of integration with other Autodesk software, streamlining workflows. A disadvantage can be the learning curve for users unfamiliar with point cloud processing and 3D modeling software.
The cost of the software and required hardware is also a factor to consider.
Recap Use Cases Across Industries
| Industry | Use Case | Advantages |
|---|---|---|
| Architecture | As-built modeling, renovation planning | Accurate documentation, efficient design integration |
| Engineering | Infrastructure inspection, structural analysis | Detailed visualization, identification of potential issues |
| Construction | Progress monitoring, quantity takeoff | Improved accuracy, streamlined workflows |
| Surveying | Terrain modeling, land development | High-precision data, efficient land planning |
| Archaeology | Site documentation, digital preservation | Non-destructive recording, preservation of historical data |
| Manufacturing | Reverse engineering, part analysis | Creation of accurate digital models, efficient design modification |
Recap Performance and Optimization

So, you’ve imported your scan data, and now you’re staring at a potentially massive point cloud. Recap’s awesome, but let’s be real – processing gigabytes of point cloud data can be a total drag if you’re not careful. This section covers strategies to keep things running smoothly, regardless of your hardware setup. We’ll look at factors that impact processing speed, optimization techniques for various hardware, managing large datasets, and streamlining your overall workflow.
Factors Affecting Recap Processing Speed
Several factors significantly influence Recap’s performance. The size of the point cloud is obviously a major player – more points mean more processing time. The complexity of the scene also matters; dense, detailed scans require more computational power. Hardware limitations, such as RAM, CPU speed, and the type of graphics card, play a critical role. Finally, the chosen processing settings within Recap itself – things like the level of detail in the mesh generation – will impact speed.
For example, generating a high-resolution mesh will take significantly longer than a low-resolution one. The type of data imported also has an effect. Noisy data or data with significant errors will require more processing time for cleaning and refinement.
Optimizing Recap Performance on Different Hardware Configurations
Optimizing Recap’s performance starts with understanding your system’s limitations. If you’re working with a lower-end system, prioritizing smaller project areas or reducing the point cloud density through decimation techniques within Recap is crucial. On higher-end systems with ample RAM and a powerful CPU, you have more flexibility to process larger datasets and higher-resolution meshes. Consider using solid-state drives (SSDs) instead of traditional hard disk drives (HDDs) for significantly faster data access.
This can drastically reduce load times. For systems with compatible graphics cards, leveraging GPU acceleration, if available within Recap’s settings, can boost processing speeds considerably. For example, a system with 32GB of RAM and a high-end graphics card will naturally handle large datasets better than a system with 8GB of RAM and an integrated graphics card.
Managing Large Point Cloud Datasets in Recap
Managing large point cloud datasets effectively is key to avoiding performance bottlenecks. One technique is to divide large projects into smaller, more manageable sections. This allows you to process each section individually, saving memory and processing time. Another strategy is to employ selective point cloud processing. Instead of processing the entire point cloud, focus on the areas of interest.
Recap provides tools to easily select and isolate specific regions for processing. Regularly saving your project and using version control can help prevent data loss and allow you to revert to previous states if necessary. Consider using external storage devices for backup and archiving.
Improving Workflow Efficiency in Recap
Efficient workflow is paramount. Before importing data, organize your files logically and name them clearly. This helps maintain project clarity and reduces the chance of errors. Utilize Recap’s built-in tools to pre-process the data, removing noise and outliers to reduce processing time. Learn to leverage keyboard shortcuts and become familiar with the Recap interface to streamline your actions.
Regularly cleaning up unnecessary files and optimizing project settings will help maintain efficiency. Creating templates for frequently used settings can save time and ensure consistency across multiple projects. Using the “Project Organizer” to manage different versions or stages of a project can keep everything neat and avoid confusion.
Troubleshooting Common Recap Issues
Let’s be real, even the coolest software has its quirks. Autodesk Recap, while powerful, isn’t immune to the occasional hiccup. This section dives into some common problems users encounter and offers practical solutions to get you back on track. Think of it as your go-to troubleshooting guide for those moments when Recap throws you a curveball.
Successfully navigating Recap’s potential pitfalls often involves understanding the source of the error. Is it a problem with the input data, the processing settings, or an issue with the output format? Knowing where to look makes all the difference.
Data Import Errors
Data import failures are a frequent source of frustration. These can stem from various issues, including corrupted source files, incompatible file formats, or problems with the file paths.
Addressing these problems often requires a systematic approach. First, verify the integrity of your source files. If they’re from a survey, double-check that the data was collected correctly. If using images, ensure they are properly formatted and free from significant distortion or blurriness. Second, confirm that Recap supports the file format.
Common formats include LAS, XYZ, and various image formats. Third, meticulously check your file paths; even a small typo can cause a failure.
- Verify Source File Integrity: Check for corruption in your source files using file verification tools if available for your specific file type.
- Confirm File Format Compatibility: Ensure your files are in a format supported by Recap (LAS, XYZ, TIFF, etc.). Consult the Autodesk Recap documentation for a complete list.
- Check File Paths: Double- and triple-check your file paths for typos or incorrect directory structures. Use the absolute file path to avoid ambiguity.
- Restart Recap and your Computer: A simple restart can often resolve temporary glitches.
Processing Errors
Processing errors can range from long processing times to outright failures. These often relate to the size and complexity of the input data, as well as the processing settings selected within Recap. For example, very large point clouds can require significant processing power and memory. Incorrectly configured settings can also lead to issues.
Optimizing processing involves careful consideration of your hardware and software configurations. Sufficient RAM and a powerful CPU are crucial for handling large datasets. Additionally, adjusting the processing parameters within Recap, such as the point cloud density and mesh resolution, can significantly impact processing time and resource usage.
- Check System Resources: Ensure your computer has sufficient RAM, processing power, and hard drive space to handle the data.
- Adjust Processing Settings: Experiment with lower point cloud density or mesh resolution to reduce processing demands. Start with less demanding settings and gradually increase them if needed.
- Divide and Conquer: Break down very large datasets into smaller, more manageable chunks for processing.
- Review Recap Logs: Check Recap’s log files for detailed error messages that might pinpoint the cause of the problem.
Export Errors
Export errors can be frustrating, preventing you from sharing your hard work. These issues often involve incompatible output formats, file size limitations, or problems with the export settings.
Successfully exporting your data depends on understanding the limitations of your chosen output format and the capabilities of the receiving software. For example, some formats might not support the level of detail in your Recap model. Similarly, excessively large files might exceed the capacity of the target software or storage medium. Therefore, it is crucial to select appropriate settings during the export process.
- Choose a Compatible Format: Select an output format compatible with your target software (e.g., IFC, FBX, DWG).
- Check File Size Limits: Be aware of file size limitations imposed by the target software or storage medium.
- Adjust Export Settings: Experiment with different export settings to optimize file size and compatibility.
- Check Export Paths: Make sure you have the necessary permissions to write to the chosen export location.
Advanced Recap Techniques
Okay, so we’ve covered the basics of Recap. Now let’s dive into some seriously cool stuff – the advanced techniques that’ll make you a Recap ninja. We’re talking about pushing the software beyond its typical uses to create truly stunning and insightful 3D models from even the most challenging datasets.
Advanced Recap features unlock a whole new level of control and precision. Think of it as going from a standard bicycle to a high-performance motorbike; you can still get where you need to go, but the journey is smoother, faster, and way more efficient. Mastering these techniques is key to producing high-quality deliverables and making your workflow more streamlined and productive.
Working with Noisy Point Clouds
Dealing with noisy point cloud data is a common challenge. This often involves points that are inaccurate, incomplete, or contain extraneous information that obscures the underlying geometry. Advanced filtering techniques within Recap, such as outlier removal and noise reduction filters, become critical. For example, imagine a scan of a construction site with lots of moving equipment or people during the scan.
The resulting point cloud will be messy. By strategically applying these filters, you can isolate the relevant data representing the building structure, discarding the noise introduced by the moving elements. Effective noise reduction involves experimenting with different filter settings to achieve the optimal balance between data preservation and noise removal, ensuring a cleaner point cloud for accurate model creation.
Mesh Optimization and Simplification
Once you’ve created a mesh from your point cloud, it might be overly dense, leading to slow performance and large file sizes. Recap offers tools to optimize and simplify meshes. This involves reducing the polygon count while preserving the essential geometric details. Consider a highly detailed scan of a historical building. The initial mesh might have millions of polygons, making it cumbersome to work with.
Mesh simplification techniques allow you to reduce this number significantly, resulting in a manageable file size without sacrificing visual fidelity for tasks like visualization or analysis. The key is to find the right balance – enough simplification to improve performance, but not so much that crucial details are lost.
Creating High-Resolution Models from Sparse Data
Sometimes you’re working with sparse point clouds, meaning there are significant gaps in the data. Advanced techniques, such as intelligent surface reconstruction algorithms and the integration of additional data sources (like orthophotos or CAD models), can help you fill these gaps and create complete, high-resolution models. Think of scanning a large forest canopy with limited visibility – resulting in a sparse cloud.
By combining the sparse point cloud with high-resolution aerial imagery, you can fill the gaps and create a much more complete model of the treetops. This approach effectively leverages the strengths of different data sources to overcome limitations inherent in any single data set.
Advanced Visualization Techniques
Recap isn’t just for creating models; it’s a powerful visualization tool. Advanced techniques include creating realistic renderings with different materials and textures, incorporating lighting and shadows for a more immersive experience, and using section planes and cutaways to reveal internal structures. For example, visualizing a proposed building design on a scanned site context allows stakeholders to better understand the project’s impact and make informed decisions.
Creating a fly-through animation of a completed building from a Recap model, complete with realistic lighting and textures, provides a compelling way to showcase the project to potential clients or investors.
Workflow for a Complex Project: A Case Study – Historic Bridge Reconstruction
Let’s imagine reconstructing a historic bridge. The workflow would begin with scanning the existing structure using a variety of methods (LiDAR, photogrammetry) to capture the current condition. Then, we’d import the resulting point clouds into Recap. We’d use advanced filtering to clean up noise from vegetation and debris. Next, we’d create a high-resolution mesh, utilizing mesh optimization to balance detail and performance.
Any missing sections, perhaps due to damaged areas, could be reconstructed using historical drawings or photos as references. Finally, we would use Recap’s visualization tools to create renderings and animations to communicate the bridge’s current state and the proposed reconstruction plan to stakeholders. This would involve accurately representing the materials and textures of the bridge, including the effects of weathering and age.
The final output could be a detailed 3D model ready for use in structural analysis and design software.
Future of Autodesk Recap
Autodesk Recap has solidified its position as a leading point cloud processing software, but the field is constantly evolving. Future developments will likely focus on improving efficiency, integrating more seamlessly with other Autodesk products, and expanding functionality to address emerging industry needs. The increasing availability of high-resolution scans and the growth of AI-powered tools will significantly shape Recap’s future trajectory.
Current trends in point cloud processing are pushing the boundaries of what’s possible. The rise of LiDAR technology, for example, is producing massive datasets that require more sophisticated processing capabilities. Simultaneously, advancements in AI and machine learning are enabling automated feature extraction and classification, significantly reducing manual workload. These trends will necessitate a corresponding evolution in Recap’s features and performance.
Improved AI-Powered Feature Extraction
Recap’s current automated feature extraction is already useful, but future versions could leverage more advanced AI algorithms to achieve higher accuracy and efficiency. Imagine a system that automatically identifies and classifies objects like trees, buildings, and vehicles with minimal user intervention, automatically generating accurate 3D models from raw point cloud data. This would dramatically reduce processing time and improve the overall workflow for large-scale projects.
For instance, this could revolutionize the surveying process by automatically generating accurate topographic maps from LiDAR scans, eliminating the need for extensive manual data processing.
Enhanced Meshing and Modeling Capabilities
The ability to generate high-quality meshes and 3D models from point cloud data is crucial. Future improvements could include algorithms that create more detailed and accurate models, with better handling of complex geometries and noisy data. The incorporation of advanced mesh simplification techniques could also enhance performance and allow for the handling of even larger datasets. Consider a scenario where Recap automatically generates a highly detailed 3D model of a historical building from a dense point cloud, preserving intricate architectural details for restoration or preservation purposes.
This level of automation would significantly reduce the time and expertise required for complex modeling tasks.
Seamless Integration with Other Autodesk Software
Further integration with other Autodesk products like Revit and Civil 3D is essential. This could involve streamlined workflows for importing and exporting data, automatic data synchronization, and the ability to directly manipulate Recap data within other Autodesk applications. For example, imagine a seamless workflow where a point cloud acquired using a drone is directly imported into Recap, processed, and then seamlessly transferred into Revit for architectural design, eliminating data loss and reducing the need for manual data transfer.
Improved Performance and Scalability
Handling increasingly larger datasets efficiently is a critical aspect of Recap’s future development. Improvements in processing speed, memory management, and parallel processing capabilities will be crucial. This could involve the use of cloud computing resources to distribute the processing load, allowing users to work with massive point clouds without experiencing performance bottlenecks. This would enable Recap to handle datasets from the latest LiDAR and photogrammetry technologies, paving the way for more complex and large-scale projects.
Expanded Support for Diverse Data Formats
Future versions of Recap should support a wider range of data formats, including those from emerging scanning technologies. This would broaden Recap’s accessibility and usability across various industries and applications. For example, support for new sensor technologies or proprietary data formats used in specialized industries would allow for greater interoperability and broader adoption of Recap.
Final Wrap-Up
So, whether you’re a seasoned pro or just starting out, Autodesk Recap offers a powerful and versatile toolkit for transforming point cloud data into usable 3D models. From simple scans to complex projects, mastering Recap opens doors to innovative workflows and stunning visualizations. It’s about more than just software; it’s about unlocking your creative potential and building amazing things.
Now go forth and Recap!
General Inquiries
What file formats does Recap support?
Recap supports a wide variety of formats, including RCS, PTS, E57, LAS, and more. Specific compatibility might depend on the Recap version.
How much RAM do I need for Recap?
The RAM requirements depend heavily on the size of your point cloud data. For larger projects, 16GB or more is highly recommended. More is always better!
Can I use Recap on a Mac?
No, Autodesk Recap is only available for Windows operating systems.
What’s the difference between meshing and surface creation in Recap?
Meshing creates a polygon-based 3D model, while surface creation generates smoother, more detailed surfaces. The best choice depends on your project needs and desired level of detail.
Is there a free version of Autodesk Recap?
There’s a free trial, but to use it regularly you’ll need a subscription.