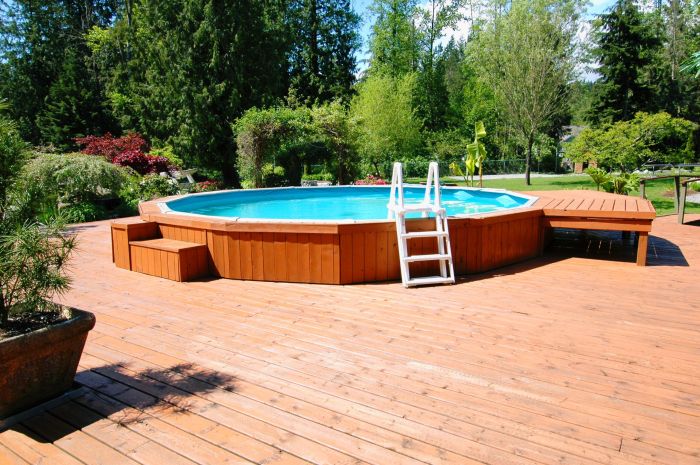
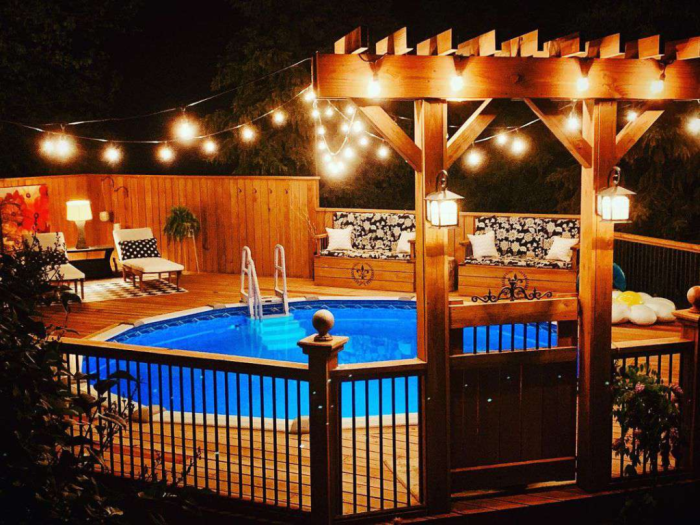
DIY Above Ground Pool Bar: Your Backyard Oasis, is more than just a construction project; it’s a gateway to creating a personalized haven for relaxation and entertainment. Imagine the warmth of the sun on your skin, the refreshing splash of water, and the laughter of friends and family, all centered around your own handcrafted pool bar. This guide will take you through the process of designing, building, and enjoying your very own poolside paradise.
Table of Contents
From planning the layout and choosing materials to adding those finishing touches that make your bar truly unique, we’ll cover every step. We’ll explore different styles, provide practical tips for budget-conscious construction, and delve into essential safety considerations. Get ready to transform your backyard into a vibrant social hub where memories are made and good times flow freely.
Planning Your DIY Above Ground Pool Bar

Building a DIY above ground pool bar is a fantastic way to enhance your backyard oasis and create a unique entertaining space. With careful planning and a little creativity, you can transform your pool area into a true party hub.
Types of Above Ground Pool Bars
When planning your pool bar, you’ll first need to decide on the type of structure that best suits your needs and budget. There are several popular options, each with its own advantages and disadvantages.
- Freestanding Bar: This is a simple and versatile option, often built from wood or metal. It offers flexibility in placement and can be easily moved if needed. The downside is that it may not provide as much storage or shelter as other options.
- Attached Bar: An attached bar is built directly onto the pool deck or patio, creating a seamless extension of the existing space. This option offers more stability and potential for built-in features, such as a sink or refrigerator. However, it requires more structural work and may be more expensive.
- Gazebo Bar: A gazebo bar combines the benefits of a freestanding bar with added protection from the elements. Gazebos offer shade, shelter from rain, and a sense of enclosure. They are typically made from metal or wood and come in various styles and sizes.
Design Ideas for Your Pool Bar
Your pool bar design should complement the existing style of your pool area and your personal preferences.
- Match the Pool’s Theme: If your pool has a tropical theme, consider incorporating bamboo, tiki torches, and bright colors into your bar design. For a more modern aesthetic, opt for sleek lines, minimalist furniture, and neutral colors.
- Consider the Space: Take into account the size and shape of your pool area when designing your bar. A small space may require a compact, freestanding bar, while a larger area can accommodate a more elaborate attached bar or gazebo.
- Add Seating: Include comfortable seating options around your bar, such as bar stools, lounge chairs, or outdoor sofas. Consider incorporating a mix of seating styles to create a relaxed and inviting atmosphere.
- Incorporate Lighting: Lighting is crucial for creating ambiance and safety around your pool bar. Use a combination of overhead lighting, string lights, and lanterns to create a warm and inviting glow.
Essential Features and Functionalities
A functional pool bar should include essential features to make entertaining easy and enjoyable.
- Serving Area: A spacious serving area is essential for preparing drinks and snacks. Include a countertop with ample space for mixing, cutting, and serving.
- Storage: Ample storage is crucial for keeping your bar organized and stocked. Consider incorporating cabinets, drawers, or shelves for storing glassware, bar tools, and other essentials.
- Ice Chest: A large ice chest is a must-have for keeping drinks cold. Choose a chest that fits comfortably within your bar design and has enough capacity for your needs.
- Sink: A sink is a convenient addition for washing glasses, rinsing fruit, and cleaning up spills. Consider installing a small, portable sink or a more permanent fixture.
- Refrigerator: A small refrigerator can be a game-changer for keeping drinks and snacks chilled. Choose a compact model that fits within your bar design.
Materials Needed for Building a DIY Above Ground Pool Bar
The materials you’ll need for your DIY pool bar will depend on the type of structure you choose and your desired level of complexity. Here are some common materials:
- Wood: Wood is a popular choice for building pool bars, offering a natural and rustic look. Consider using pressure-treated lumber for durability and resistance to moisture.
- Metal: Metal is a durable and low-maintenance option for pool bars. Aluminum, steel, and wrought iron are common choices.
- Concrete: Concrete can be used for creating a sturdy base for your bar or for building a permanent countertop.
- Hardware: You’ll need various hardware components, such as screws, bolts, hinges, and brackets, for assembling your bar.
- Finishing Materials: Consider using paint, stain, or sealant to protect your bar from the elements and enhance its appearance.
Choosing the Right Location and Design

The location and design of your pool bar are crucial for maximizing its functionality and enjoyment. Carefully considering these factors will ensure your bar is a perfect addition to your poolside oasis.
Location Considerations, Diy above ground pool bar
Selecting the ideal location for your pool bar involves weighing several factors, including access, sun exposure, and privacy.
- Accessibility: Choose a location that is easily accessible from both the pool and the main house. This ensures guests can easily grab drinks and snacks without having to navigate a complicated path.
- Sun Exposure: Consider the sun’s path throughout the day. A location that offers shade during the hottest hours is ideal, especially if your pool bar will have seating areas. A covered structure or strategically placed trees can provide much-needed respite from the sun.
- Privacy: If you prefer a more intimate setting, choose a location that offers some privacy from neighbors or passersby. A secluded corner of the yard or a location shielded by trees or fencing can create a more private atmosphere.
Designing a Functional Layout
Once you’ve chosen the location, you can start planning the layout of your pool bar. Here are some tips for maximizing space and functionality:
- Define Zones: Divide your pool bar into distinct zones, such as a serving area, a seating area, and a storage area. This will help you organize the space and ensure everything has its place.
- Consider Traffic Flow: Plan the layout to ensure smooth traffic flow. You don’t want guests bumping into each other or having to squeeze through narrow spaces. Consider a bar counter with a wide enough space for guests to move around comfortably.
- Storage Solutions: Include ample storage for drinks, glasses, ice, and other bar supplies. You can use shelves, cabinets, or even a small refrigerator to keep everything organized and easily accessible.
Visualizing Your Pool Bar Design
To help visualize your pool bar design, consider creating a simple sketch or diagram. This will allow you to play around with different layouts and features before you start building.
- Dimensions: Start by determining the overall dimensions of your pool bar. This will depend on the size of your space and your desired functionality. Consider a bar counter that is at least 3 feet deep and long enough to accommodate guests comfortably.
- Features: Include key features such as a sink, a refrigerator, a storage area, and seating. Consider incorporating additional features like a grill, a pizza oven, or a sound system.
Materials and Construction
The materials and construction methods for your pool bar will depend on your budget, desired style, and the overall design.
- Structure: You can choose from various materials for the structure of your pool bar, including wood, metal, or composite decking. Consider the durability and maintenance requirements of each material.
- Countertop: The countertop should be durable and easy to clean. Options include granite, quartz, concrete, or even reclaimed wood.
- Finishing Touches: Add finishing touches to personalize your pool bar, such as lighting, decorative accents, and bar stools. These elements will enhance the atmosphere and create a unique space for entertaining.
Building the Bar Structure

Now that you’ve chosen the perfect spot and designed your dream pool bar, it’s time to get your hands dirty and build the actual structure. This section will guide you through the process of constructing a sturdy and stable bar frame, attaching the bar top, and adding supporting shelves.
Constructing the Bar Frame
Building the frame is the foundation of your pool bar. It’s crucial to choose the right materials and follow proper construction techniques to ensure a robust and long-lasting structure.
- Materials: You’ll need pressure-treated lumber for the frame, as it’s resistant to moisture and decay. Consider using 4×4 posts for the main support beams and 2x4s for the framing.
- Tools: Gather your essential tools, including a saw, drill, level, tape measure, and a post-hole digger or auger.
- Framing the Base: Begin by creating a rectangular frame using the 4×4 posts. Cut the posts to the desired length and secure them together at the corners using strong wood screws or lag bolts. Ensure the frame is level and square.
- Adding Support Beams: Install additional support beams using 2x4s, running horizontally across the frame. This will reinforce the structure and provide a solid base for the bar top.
- Creating a Stable Base: To prevent the bar from shifting or tipping, anchor the frame to the ground. You can achieve this by:
- Concrete Footings: Dig holes at each corner of the frame and pour concrete footings. Allow the concrete to cure completely before attaching the frame.
- Ground Anchors: Use ground anchors, also known as “ground screws,” to secure the frame. These are metal screws that are driven into the ground and provide a strong anchor point.
Attaching the Bar Top and Shelves
Once the frame is constructed and secured, it’s time to add the bar top and supporting shelves.
- Bar Top Options: You have several options for the bar top.
- Wood: Use a thick piece of treated lumber or composite decking for a classic look.
- Concrete: Create a durable and stylish concrete countertop.
- Tile: Cover a plywood base with tiles for a decorative and easy-to-clean surface.
- Attaching the Bar Top: Secure the bar top to the frame using strong screws or brackets. Ensure the top is level and flush with the frame.
- Adding Shelves: To create storage space, install shelves below the bar top. Use 2x4s for the shelf supports and attach them to the frame. Choose a material for the shelves that complements the bar top, such as wood, metal, or plastic.
Ensuring a Sturdy and Stable Bar Structure
- Reinforcement: Consider adding additional bracing to the frame, especially if you’re building a large or heavy bar. This will further enhance its stability.
- Proper Anchoring: Ensure that the bar is properly anchored to the ground, using concrete footings or ground anchors, as described earlier.
- Load Capacity: When choosing materials and designing the frame, factor in the expected weight of the bar top, shelves, and any additional items you plan to place on the bar.
Building a DIY above ground pool bar is an investment in relaxation, entertainment, and lasting memories. With careful planning, a dash of creativity, and a commitment to quality, you can create a stunning centerpiece for your backyard that will be enjoyed for years to come. So, gather your tools, embrace the challenge, and let your vision for a perfect poolside oasis come to life.
Building a DIY above ground pool bar can be a fun and rewarding project. You’ll want to consider the materials you’ll need, such as sturdy wood for the frame and a waterproof countertop. Remember to keep safety in mind, especially if you’re using electrical appliances near water. For example, you’ll need to ensure that all wiring is properly insulated and protected, just like the use of vancomycin requires careful handling and administration.
Once your bar is built, you can enjoy your own poolside oasis with friends and family.

