DIY bows for wreaths are a fantastic way to add a personal touch to your home decor. They’re incredibly versatile, allowing you to create unique designs that perfectly match your style and the season. Whether you’re a seasoned crafter or a beginner, making your own bows is a rewarding experience, and the results are often more beautiful and cost-effective than store-bought options.
Table of Contents
The world of wreath bows is diverse, encompassing classic loops, cascading ribbons, and layered designs. This guide will walk you through the basics of bow-making, explore different styles, and offer tips for embellishing and attaching your creations to wreaths.
Introduction to DIY Bows for Wreaths

Creating your own bows for wreaths adds a personal touch and allows you to customize your decor to perfectly match your style and the occasion. It’s a fun and rewarding craft that lets you unleash your creativity while saving money compared to purchasing pre-made bows.
DIY bows offer incredible versatility. You can experiment with different colors, patterns, textures, and sizes to achieve unique looks. Whether you’re aiming for a classic, rustic, modern, or whimsical style, DIY bows provide the freedom to express your design vision.
Types of Bows Commonly Used on Wreaths
The types of bows commonly used on wreaths are diverse, each adding a distinct character to the final design. Here are some of the most popular types:
- Classic Bow: This timeless bow is the foundation for many wreath designs. It features a central loop with two symmetrical tails on either side. It’s simple yet elegant, suitable for various wreath styles.
- Burlap Bow: Burlap bows bring a rustic charm to wreaths. They are often used for fall and winter decorations, adding a touch of warmth and texture.
- Ribbon Bow: Ribbon bows are incredibly versatile, available in a wide array of colors, widths, and textures. They can be used to create both simple and elaborate bows, allowing for a wide range of styles.
- Wire-Edge Bow: Wire-edge ribbon is a popular choice for creating bows with defined shapes. The wire allows for precise shaping and holds the bow’s form well.
- Double Bow: A double bow adds extra volume and visual interest to wreaths. It features two bows layered on top of each other, creating a fuller and more dramatic effect.
Materials and Tools
Crafting your own bows for wreaths is a fun and rewarding project. It allows you to personalize your wreaths with unique colors, textures, and embellishments. To get started, you’ll need a few essential materials and tools.
Ribbon Types
Ribbons are the heart of your bow, and choosing the right type can significantly impact the final look. Here are some common ribbon types for crafting bows:
- Wire-edged ribbon: This ribbon is known for its ability to hold its shape, making it ideal for crafting bows that maintain their form. The wire edge allows you to bend and shape the ribbon, creating defined loops and curves.
- Grosgrain ribbon: This sturdy ribbon with a textured weave is another popular choice for bows. It’s available in a wide range of colors and patterns, adding visual interest to your wreaths.
- Satin ribbon: Satin ribbons provide a luxurious and elegant touch. Their smooth, shiny surface adds a touch of sophistication to your creations.
- Burlap ribbon: For a rustic or farmhouse aesthetic, burlap ribbon offers a unique texture and a natural, earthy feel.
Wire
Wire is essential for securing your bow and attaching it to the wreath.
- Floral wire: This thin, pliable wire is ideal for securing the loops of your bow and creating intricate designs.
- Wire ribbon: This type of ribbon has a wire edge that allows you to shape and bend it for creating decorative elements within your bow.
Glue
Glue is crucial for attaching your bow to the wreath and securing embellishments.
- Hot glue gun: This tool provides a quick and strong bond, perfect for attaching ribbon, wire, and other embellishments.
- Fabric glue: Fabric glue is suitable for bonding delicate materials like fabric and ribbon, ensuring a strong and flexible bond.
Decorative Embellishments, Diy bows for wreaths
Embellishments add personality and visual interest to your bows.
- Floral picks: These decorative elements come in various shapes, sizes, and colors, allowing you to add a touch of nature to your bows.
- Beads and sequins: Add sparkle and shine to your bows with beads and sequins in coordinating colors.
- Buttons and charms: Unique buttons and charms can add a personal touch and visual interest to your bows.
- Faux berries and fruits: These realistic-looking embellishments can add a touch of autumnal charm to your bows.
Tools
The right tools make crafting bows a breeze.
- Scissors: Sharp scissors are essential for cutting ribbon and wire accurately.
- Wire cutters: Wire cutters are needed for cutting floral wire and wire ribbon.
- Hot glue gun: A hot glue gun provides a quick and strong bond for securing your bow and embellishments.
- Measuring tape: A measuring tape helps you determine the appropriate ribbon length for your bow.
- Needle and thread: A needle and thread are useful for securing ribbon tails and creating intricate designs.
Basic Bow-Making Techniques

Creating a beautiful bow for your wreath is easier than you might think. With a few basic techniques and a little practice, you can create stunning bows that will add a touch of elegance to your holiday decor.
Here’s a step-by-step guide to making a simple bow, along with tips and tricks for achieving a professional look:
Gathering Materials
Before you begin, make sure you have all the necessary materials on hand. These typically include:
- Ribbon: Choose a ribbon that complements the colors and style of your wreath. Consider the width and texture of the ribbon, as these will affect the overall look of the bow.
- Scissors: Sharp scissors are essential for clean cuts.
- Wire: Floral wire is used to secure the bow and create loops.
- Wire cutters: These are helpful for cutting the wire.
- Hot glue gun: A hot glue gun is useful for securing the bow to the wreath.
Creating the Bow
Once you have your materials gathered, you can start making your bow. Here are the basic steps:
- Cut the ribbon: Cut a length of ribbon that is about 3 times the desired width of your bow. For example, if you want a bow that is 6 inches wide, cut a ribbon that is 18 inches long.
- Fold the ribbon: Fold the ribbon in half lengthwise, creating a crease down the center. This will help you create symmetrical loops.
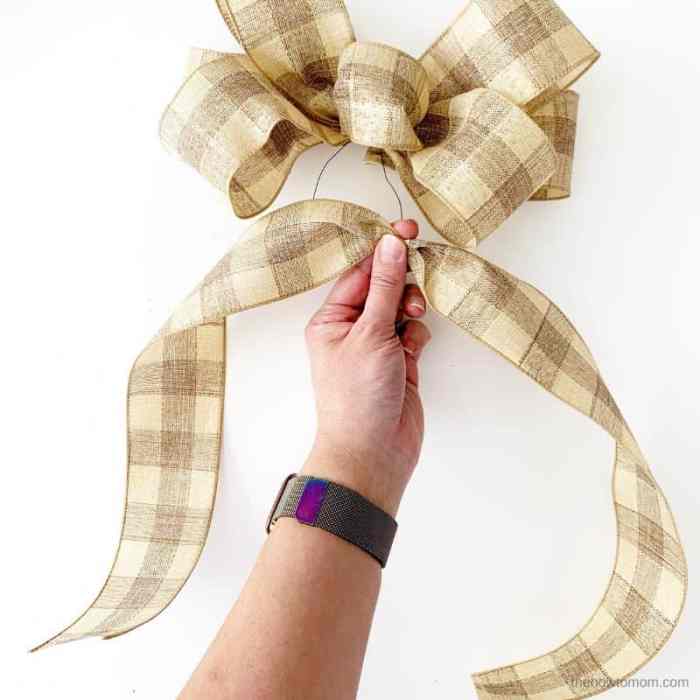
- Create the loops: Pinch the ribbon in the middle, then twist it to create two loops on either side. The size of the loops will determine the overall size of your bow. You can adjust the size of the loops by pulling on the ribbon.
- Secure the loops: Once you are satisfied with the size of the loops, use wire to secure them together in the center. Twist the wire tightly to create a secure hold.
- Add a tail: Cut two pieces of ribbon that are about 1/3 the length of your bow. These will be the tails of the bow. Tie the tails to the center of the bow, using wire or hot glue to secure them.
Tips for a Professional Look
- Use high-quality ribbon: Choosing a ribbon that is made from sturdy material will help your bow maintain its shape and look its best.
- Cut the ribbon at an angle: This will create a more polished look for your bow tails.
- Use wire cutters to trim the wire: This will ensure a clean and even cut.
- Experiment with different ribbon combinations: Don’t be afraid to get creative and try different ribbon colors, patterns, and textures.
Variations and Styles
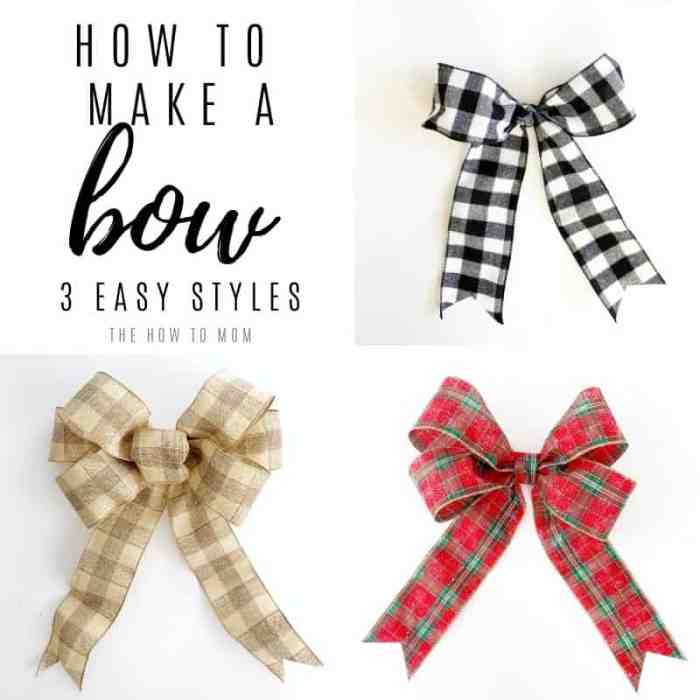
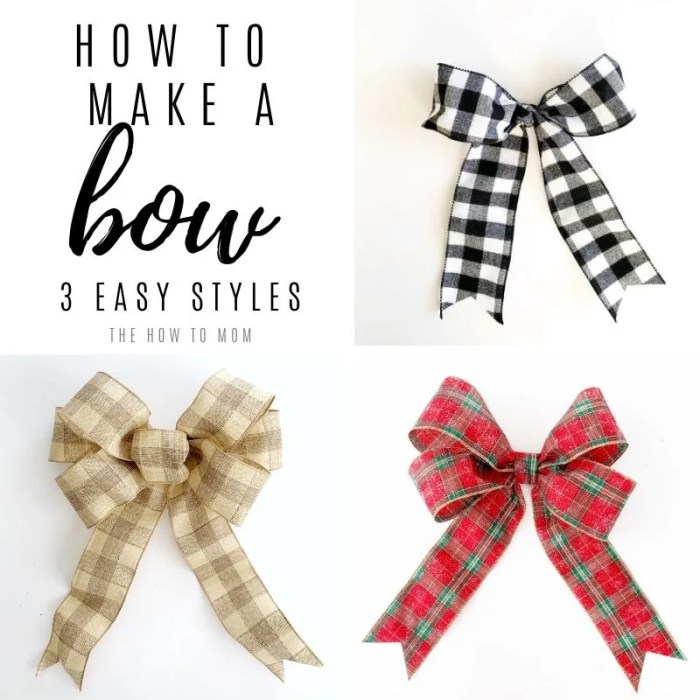
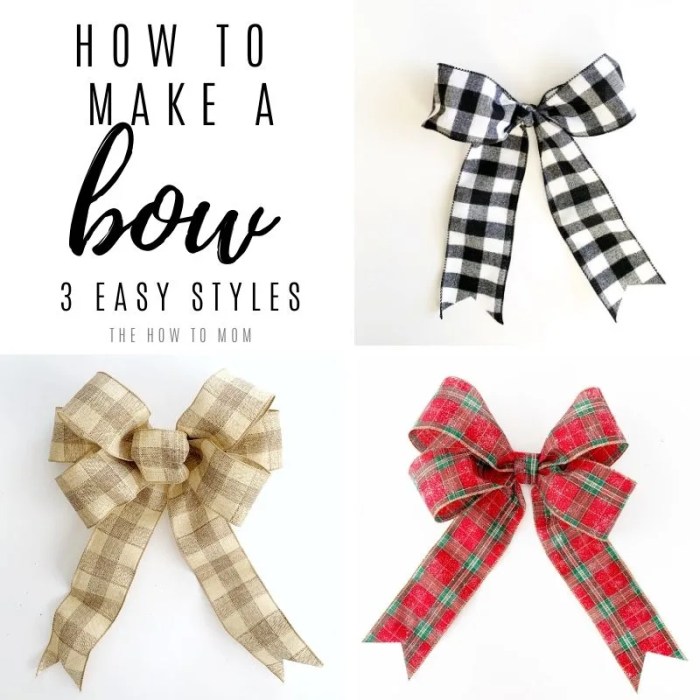
The world of bow-making offers a plethora of styles, each contributing a unique aesthetic to your wreaths. Beyond the basic bow, there are countless variations to explore, allowing you to personalize your creations.
Classic Loop Bow
The classic loop bow is a timeless and versatile style that works well for any occasion. It’s characterized by its symmetrical loops, creating a balanced and elegant appearance.
- Materials: You’ll need ribbon, wire, and scissors.
- Instructions:
- Cut a length of ribbon, ensuring it’s long enough to create multiple loops.
- Fold the ribbon in half, creating a center point.
- Using your fingers, form loops on either side of the center point.
- Secure the loops by twisting the ribbon at the center point and wrapping it with wire.
- Trim the ends of the ribbon for a clean finish.
The classic loop bow is a great foundation for adding embellishments like pinecones, berries, or other decorative elements.
Cascading Bow
The cascading bow, as the name suggests, creates a flowing and dramatic effect. This style is particularly effective for larger wreaths, where it can add a touch of grandeur.
- Materials: You’ll need ribbon, wire, and scissors.
- Instructions:
- Cut a length of ribbon, ensuring it’s long enough to create multiple loops.
- Fold the ribbon in half, creating a center point.
- Form a loop at the center point, leaving a tail of ribbon on either side.
- Create a second loop, placing it directly below the first loop, and overlapping the ribbon tails.
- Continue forming loops in this cascading pattern, overlapping the ribbon tails with each loop.
- Secure the bow by twisting the ribbon at the center point and wrapping it with wire.
- Trim the ends of the ribbon for a clean finish.
Layered Bow
The layered bow offers a unique and textured look, achieved by layering multiple bows on top of each other. This style is perfect for adding depth and dimension to your wreaths.
- Materials: You’ll need ribbon, wire, and scissors.
- Instructions:
- Create two or more classic loop bows, varying the size and ribbon width.
- Layer the bows on top of each other, securing them together with wire at the center point.
- Trim the ends of the ribbon for a clean finish.
Adding Embellishments and Personalization
Once you’ve mastered the basics of bow-making, you can add a touch of personal flair with embellishments and personalization. This is where your creativity can truly shine!
Embellishments and personalization allow you to create unique bows that reflect your style and the occasion. They can transform a simple bow into a stunning centerpiece for your wreath.
Adding Embellishments
Embellishments can add dimension, texture, and color to your bows. Here are some ideas:
- Beads: Add sparkle and glamour with beads of various sizes, shapes, and colors. You can attach them directly to the bow with glue or thread them onto wire or ribbon.
- Flowers: Artificial flowers, silk flowers, or even dried flowers can add a touch of elegance and natural beauty. Secure them with wire or glue.
- Ribbons: Use different widths and textures of ribbon to create interesting patterns and layers. Consider adding a contrasting ribbon for a pop of color.
- Other Decorative Elements: Get creative with other embellishments like buttons, charms, glitter, or even small pieces of fabric.
Personalizing Bows for Specific Themes or Seasons
Personalization is key to making your bows truly unique. Here’s how you can customize them for different themes and seasons:
- Holiday Themes: Use colors, shapes, and embellishments that reflect the holiday you’re celebrating. For example, red and green for Christmas, orange and black for Halloween, or pink and red for Valentine’s Day.
- Seasonal Themes: Incorporate elements that evoke the feeling of a particular season. For example, use fall foliage colors like brown, orange, and yellow for autumn, or light blues and greens for spring.
- Personal Preferences: Let your personal style guide your choices. If you love rustic decor, use natural materials like burlap, twine, and wood. If you prefer a more modern look, opt for sleek, geometric shapes and metallic accents.
Attaching Bows to Wreaths
Once you’ve created your perfect bow, it’s time to attach it to your wreath. There are a few different methods you can use, each with its own advantages and disadvantages.
Wiring
Wiring is a popular method for attaching bows to wreaths because it offers a secure and adjustable hold.
- To wire a bow, you’ll need floral wire or craft wire. Cut a piece of wire long enough to wrap around the wreath and secure the bow.
- Wrap the wire around the base of the bow, making sure to twist the ends together securely.
- Then, wrap the wire around the wreath, tucking the ends into the greenery or other embellishments.
- You can adjust the position of the bow by loosening or tightening the wire.
Gluing
Gluing is another option for attaching bows to wreaths.
- This method is best for lightweight bows or bows that will be displayed indoors.
- Use a strong adhesive, such as hot glue or craft glue, to attach the bow to the wreath.
- Apply glue to the back of the bow and press it firmly onto the wreath.
- Hold the bow in place for a few minutes to allow the glue to set.
Floral Tape
Floral tape is a versatile material that can be used to attach bows to wreaths, as well as to secure other embellishments.
- Floral tape is stretchy and adheres to itself, making it easy to wrap around the wreath and bow.
- Start by wrapping the tape around the base of the bow.
- Then, wrap the tape around the wreath, tucking the ends into the greenery or other embellishments.
- You can use floral tape to create a variety of effects, such as layering bows or creating a cascading effect.
Placement and Balance
When attaching bows to wreaths, it’s important to consider placement and balance.
- Place the bow in a location that complements the overall design of the wreath.
- If you’re using multiple bows, arrange them in a balanced and aesthetically pleasing way.
- Avoid placing bows in a way that will block the view of other embellishments.
-
“A well-placed bow can elevate the look of any wreath.”
Inspiration and Design Ideas

The beauty of DIY bows lies in their endless possibilities. You can create bows that perfectly complement your wreath’s theme, color palette, and overall style. This section will provide you with a wealth of inspiration to spark your creativity, showcasing a diverse range of bow designs, incorporating various colors, textures, and embellishments. Let your imagination run wild and experiment with different combinations to create your own unique designs.
Color Combinations
Color is a powerful tool in design, and it can instantly transform the look and feel of your bow. Consider the following color combinations to create stunning and eye-catching bows:
- Monochromatic: Using different shades of the same color creates a sophisticated and elegant look. For example, a bow made with various shades of blue will have a cohesive and calming effect.
- Complementary: Colors that sit opposite each other on the color wheel create high contrast and visual interest. For instance, a red bow with a green accent adds vibrancy and energy.
- Analogous: Colors that are adjacent to each other on the color wheel create a harmonious and balanced look. A bow made with shades of orange, yellow, and red will have a warm and inviting feel.
- Triadic: Using three colors that are equally spaced on the color wheel creates a balanced and visually appealing combination. A bow made with blue, orange, and green will have a bold and eye-catching effect.
Texture and Material
The texture of your ribbon can add depth and dimension to your bow. Experiment with different materials to create unique and interesting designs:
- Satin: A classic choice for bows, satin ribbons offer a smooth and luxurious look.
- Burlap: Adds a rustic and natural feel to your bow, perfect for farmhouse-style wreaths.
- Wire-edged ribbon: Offers greater flexibility and structure, making it ideal for creating more defined and intricate bow shapes.
- Mesh ribbon: Creates a voluminous and airy look, perfect for adding a touch of whimsy to your bow.
- Velvet: Adds a touch of elegance and sophistication, ideal for creating bows for special occasions.
Embellishments and Personalization
Embellishments can elevate your bow from simple to stunning. Here are some ideas for adding a personal touch:
- Floral accents: Add fresh or artificial flowers to your bow for a touch of natural beauty.
- Beads and sequins: Create a glamorous and sparkly look with beads and sequins.
- Ribbons and bows: Combine different ribbon widths and styles to create layered and textured bows.
- Personalized tags: Add a personal touch with a tag that includes a name, date, or special message.
- Seasonal elements: Incorporate elements that reflect the season, such as pinecones, berries, or snowflakes.
Troubleshooting and Tips: Diy Bows For Wreaths
Even the most experienced crafters can encounter challenges when making DIY bows. This section will address common issues, provide solutions, and offer practical tips to help you create beautiful and professional-looking bows.
Troubleshooting Common Issues
Here are some common challenges faced when making DIY bows and their solutions:
- Uneven Bow Loops: Uneven loops can result from inconsistent tension when wrapping the ribbon. To avoid this, ensure you maintain consistent pressure and tightness while wrapping. It’s also helpful to use a measuring tape to ensure the loops are all the same size.
- Loose or Untidy Bows: This is often caused by using the wrong ribbon type or inadequate securing techniques. Choose ribbons with good structure and hold, and use a strong glue or wire to secure the bow tightly.
- Difficulty in Creating a Center Loop: The center loop is the focal point of a bow, and creating a neat one can be tricky. To achieve a perfect center loop, use a wire or a sturdy piece of ribbon to create a small loop before wrapping the remaining ribbon around it.
- Bow Slouching or Falling Flat: This can happen due to insufficient fullness or improper wire placement. Ensure you use enough ribbon to create a full and voluminous bow. Also, strategically place the wire to provide support and prevent slouching.
Tips for a Professional Finish
Here are some tips to help you achieve a professional finish for your DIY bows:
- Practice Makes Perfect: The more you practice, the better you will become at creating beautiful bows. Experiment with different ribbon types, techniques, and styles to find what works best for you.
- Use Quality Materials: Invest in high-quality ribbons that are durable, easy to work with, and create a beautiful finish. Avoid cheap or flimsy ribbons that can easily fray or lose their shape.
- Clean and Sharp Scissors: Using sharp scissors will ensure clean cuts and prevent fraying. Clean scissors regularly to avoid damaging the ribbon.
- Use a Ribbon Gauge: A ribbon gauge can help you create consistent and even bow loops. It’s a handy tool for beginners, but even experienced crafters can benefit from its use.
- Secure the Bow Tightly: Use strong glue or wire to secure the bow tightly to the wreath. This will prevent the bow from falling off or becoming loose over time.
With a little practice and creativity, you can transform your wreaths into stunning masterpieces with DIY bows. Remember, the key is to experiment and have fun! Whether you’re crafting bows for holidays, special occasions, or simply to enhance your everyday decor, the satisfaction of creating something beautiful with your own hands is truly rewarding.
DIY bows for wreaths are a fun and easy way to add a personal touch to your holiday decor. You can use a variety of materials, from ribbon to fabric scraps, to create unique and festive bows. If you’re working with delicate materials, be sure to use a sharp pair of scissors and a good quality glue. You can also find helpful tutorials online to guide you through the process.
Speaking of delicate materials, it’s important to be aware of potential hazards when crafting. For example, certain types of glue may contain chemicals that could cause irritation or allergic reactions. It’s a good idea to wear gloves and ensure proper ventilation while working with adhesives. Just like some people are sensitive to certain types of glue, others may need to take anticoagulants for medical reasons.
These medications help prevent blood clots, but they can also increase the risk of bleeding. It’s always best to be aware of potential risks and take precautions when working with any materials, especially those that might be hazardous. Once your bows are complete, you can attach them to your wreaths with a hot glue gun or wire. Enjoy the process of creating beautiful and unique bows for your holiday wreaths!


