DIY cardboard shelves offer a unique and environmentally conscious approach to storage and organization. By repurposing readily available cardboard boxes, you can create functional and stylish shelves for your home or workspace.
Table of Contents
These shelves are not only cost-effective but also sustainable, reducing waste and promoting a greener lifestyle. The versatility of cardboard allows for endless creative possibilities, enabling you to craft shelves that perfectly suit your needs and aesthetic preferences.
Introduction to DIY Cardboard Shelves
Cardboard, a material often discarded as waste, can be transformed into functional and stylish shelving solutions. This DIY project offers a sustainable and cost-effective alternative to traditional shelving options. By repurposing cardboard, you can create unique and personalized storage solutions for your home or office.
Benefits of Using Cardboard for Shelving
Cardboard is a versatile material that offers several benefits for DIY shelving projects. Its lightweight nature makes it easy to handle and install, while its durability ensures that it can withstand moderate weight. Moreover, cardboard is readily available and affordable, making it an economical choice for budget-conscious individuals.
- Environmental Sustainability: By using recycled cardboard, you contribute to reducing waste and promoting a more sustainable lifestyle. Cardboard is biodegradable and can be easily recycled, minimizing its environmental impact.
- Cost-Effectiveness: Cardboard is significantly cheaper than wood or metal, making it a budget-friendly option for shelving. This affordability allows you to create multiple shelves without breaking the bank.
- Versatility and Customization: Cardboard’s malleability allows for creative and personalized shelf designs. You can easily cut, shape, and decorate cardboard to create unique and functional shelving units that fit your specific needs and aesthetic preferences.
Materials and Tools
You’ll need a few basic supplies to build your cardboard shelves. The key is to choose sturdy cardboard and use safe tools for cutting and assembly.
Cardboard Selection
The cardboard you choose will determine the strength and durability of your shelves. Look for cardboard that is thick and rigid, such as boxes from appliances, furniture, or heavy-duty shipping. Avoid thin, flimsy cardboard, as it won’t support much weight.
It’s best to use cardboard that is at least 1/8 inch thick for a sturdy shelf.
- Corrugated cardboard: This type of cardboard has a wavy, fluted core that provides extra strength and stability. It’s commonly found in appliance boxes and shipping cartons.
- Double-walled cardboard: This cardboard has two layers of corrugated material, making it even stronger than single-walled cardboard. It’s often used for heavy-duty boxes.
Cutting Tools
Using the right tools for cutting cardboard will ensure clean, precise cuts and a safe experience.
- Utility knife: This versatile tool is essential for cutting cardboard. Use a sharp blade and a cutting mat to prevent damage to your work surface.
- Scissors: Scissors can be used for cutting smaller pieces of cardboard or making curved cuts.
- Rotary cutter: This tool is ideal for making precise, straight cuts through thick cardboard. It features a sharp, rotating blade and a cutting mat.
- Ruler: A ruler is essential for measuring and marking your cardboard before cutting.
Other Supplies
In addition to cardboard and cutting tools, you’ll need some other supplies to build your shelves.
- Glue: Use a strong, all-purpose glue that bonds well to cardboard. White glue, wood glue, or hot glue are all good options.
- Tape: Use strong packing tape or duct tape to reinforce joints and secure your shelves.
- Measuring tape: A measuring tape is essential for determining the size and dimensions of your shelves.
- Pencil: Use a pencil to mark your cardboard before cutting.
- Safety glasses: Wear safety glasses to protect your eyes from flying debris when cutting cardboard.
Design and Planning
The design of your cardboard shelves will determine their functionality, aesthetics, and overall appeal. It’s crucial to consider your needs and preferences when planning your shelves. This involves envisioning the purpose of the shelves, the items they will hold, and the desired look and feel.
Let’s explore some design ideas and how to plan for their construction.
DIY cardboard shelves are a great way to add storage space to any room without breaking the bank. You can find inspiration for all kinds of designs online, from simple floating shelves to elaborate multi-tiered units. While you’re browsing, you might even come across some interesting information on medications like mazindol , but be sure to focus on your crafting goals! Once you’ve got your design planned out, you can start cutting and assembling your cardboard shelves, and before you know it, you’ll have a stylish and functional new storage solution.
Types of Shelf Designs
The design of your cardboard shelves can range from simple to complex, depending on your desired functionality and aesthetic. Here are some examples:
- Simple Shelves: These are basic shelves with a rectangular shape and minimal embellishments. They are ideal for storing books, files, or everyday items. A simple design can be achieved with a few cardboard boxes, some glue, and tape.
- Complex Shelves: These shelves incorporate intricate designs, such as curves, angles, and multiple tiers. They can be used for displaying decorative items, creating unique storage solutions, or adding a touch of artistry to your space. Creating complex designs might require more cardboard, time, and precision.
- Decorative Shelves: These shelves prioritize aesthetics and can be adorned with various embellishments, such as paint, fabric, or wallpaper. You can create decorative shelves with themes, patterns, or specific colors to complement your existing decor.
Shelf Designs for Different Purposes
Here are some design ideas for different purposes:
- Bookshelves: Bookshelves can be designed to accommodate various sizes and types of books. You can create shelves with adjustable heights, dividers, or decorative elements to enhance their visual appeal.
- Storage Shelves: Storage shelves can be designed for various purposes, such as organizing clothes, toys, or household items. You can create shelves with compartments, drawers, or open spaces to maximize storage capacity.
- Display Shelves: Display shelves can be designed to showcase decorative items, collectibles, or personal treasures. You can create shelves with unique shapes, colors, or textures to highlight your prized possessions.
Measuring and Planning
Accurate measuring and planning are essential for building sturdy and functional cardboard shelves. Here’s why:
“Failing to plan is planning to fail.”
Before you start cutting and assembling your shelves, take precise measurements of the space where you intend to place them. This includes the height, width, and depth of the shelves, as well as the distance between them. Consider the weight of the items you plan to store and ensure the shelves are strong enough to support them.
You can use a ruler, measuring tape, and pencil to mark the dimensions on your cardboard. Creating a simple sketch or diagram can help visualize the final product and identify any potential challenges.
Construction Techniques
Now that you have your materials and a plan, it’s time to start building! Constructing cardboard shelves involves a few basic techniques that can be mastered with a little practice.
Cutting and Shaping
Cutting cardboard is relatively straightforward. A utility knife is the best tool for the job, as it provides precise cuts. You can use a ruler or measuring tape to mark your cuts, and a cutting mat will protect your work surface. When cutting, apply firm pressure and use a sawing motion to create clean lines.
To shape cardboard, you can use a variety of methods. For simple curves, you can score the cardboard along the desired curve and then bend it into shape. For more complex shapes, you can use a cardboard scoring tool or a craft knife.
Assembling Cardboard Shelves, Diy cardboard shelves
There are several ways to assemble cardboard shelves. Here are a few common methods:
* Gluing: This is a simple and effective method for joining cardboard pieces. Use a strong craft glue or wood glue, and apply it evenly to the surfaces to be joined.
* Taping: Masking tape or duct tape can be used to reinforce joints and create a more durable finish. Apply tape to the edges of the cardboard pieces, overlapping the tape by at least half an inch.
* Stapling: For heavier cardboard, staples can be used to secure joints. Use a heavy-duty stapler and drive the staples through the cardboard and into the underlying support structure.
* Fastening with Screws or Nails: You can use screws or nails to secure cardboard to a wooden frame or other sturdy support. This method is particularly useful for shelves that will be carrying heavy loads.
Reinforcing Cardboard Structures
Cardboard, while versatile, is not as strong as wood or metal. To increase the durability and stability of your cardboard shelves, you can use a few reinforcement techniques:
* Adding Braces: Braces are triangular supports that can be used to strengthen corners and prevent sagging. They can be made from cardboard, wood, or metal.
* Using Cardboard Layers: Adding layers of cardboard to your shelves can increase their thickness and strength. This is particularly useful for shelves that will be carrying heavy loads.
* Adding a Wooden Frame: A wooden frame can provide additional support and stability to your cardboard shelves. This is a good option for shelves that will be carrying a lot of weight.
Decorative Elements and Finishes
Once your cardboard shelves are assembled, you can add decorative elements and finishes to personalize them. Here are a few ideas:
* Painting: Paint your cardboard shelves with acrylic paint, spray paint, or chalkboard paint to give them a unique look.
* Wallpaper: Apply wallpaper to the shelves for a more sophisticated finish.
* Fabric: Cover your shelves with fabric using fabric glue or staples for a soft and cozy look.
* Embellishments: Add decorative embellishments such as buttons, beads, or ribbons to personalize your shelves.
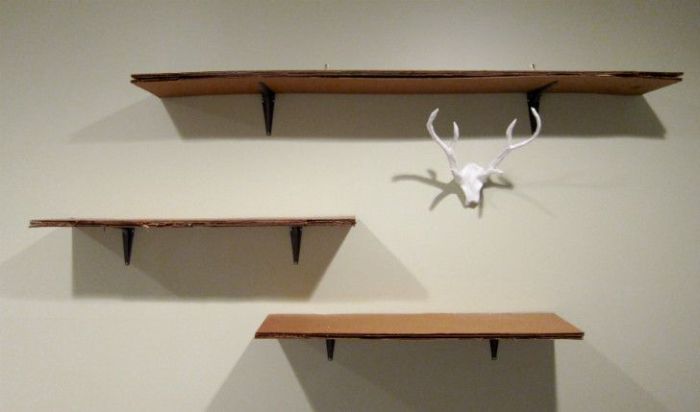
Shelf Support and Stability

The stability of your cardboard shelves is crucial for ensuring they can safely hold your belongings. Choosing the right support system is key to preventing the shelves from sagging or collapsing.
There are several methods for supporting cardboard shelves, each with its own advantages and disadvantages. The best method for you will depend on the size and weight capacity of your shelves, as well as the overall design of your shelving unit.
Using Brackets
Brackets are a common and effective way to support cardboard shelves. They are typically made of metal or plastic and are designed to be attached to the wall or to a vertical support structure. Brackets come in various sizes and styles, allowing you to choose the best option for your needs.
Brackets offer several advantages:
- They are relatively inexpensive.
- They are easy to install.
- They provide strong support for the shelves.
When choosing brackets for your cardboard shelves, consider the following factors:
- Shelf size and weight capacity: Select brackets that are strong enough to support the weight of the shelves and the items you plan to store on them.
- Shelf thickness: Choose brackets that are designed to fit the thickness of your cardboard shelves.
- Aesthetic considerations: Consider the style of the brackets and how they will look with your shelving unit.
Using Supports
Supports can be used to create a more robust and stable shelving unit. Supports can be made from various materials, such as wood, metal, or even cardboard. They are typically placed beneath the shelves to provide additional support and prevent sagging.
Supports offer several advantages:
- They provide increased stability for the shelves.
- They can be used to create different shelf heights and configurations.
- They can be customized to fit the specific design of your shelving unit.
When using supports for your cardboard shelves, consider the following factors:
- Support material: Choose a material that is strong enough to support the weight of the shelves and the items you plan to store on them.
- Support size and shape: Select supports that are the right size and shape for your shelves and the overall design of your shelving unit.
- Support placement: Place supports strategically to provide maximum stability.
Built-in Structures
For more complex shelving units, you can incorporate built-in structures to provide support. This can involve creating a frame for the shelves using cardboard, wood, or other materials.
Built-in structures offer several advantages:
- They provide a more integrated and stable shelving system.
- They allow for greater customization and design flexibility.
- They can be used to create unique and attractive shelving units.
When designing built-in structures for your cardboard shelves, consider the following factors:
- Structure material: Choose a material that is strong enough to support the weight of the shelves and the items you plan to store on them.
- Structure design: Design the structure to provide adequate support for the shelves and to fit the overall design of your shelving unit.
- Construction techniques: Use appropriate construction techniques to ensure the structure is strong and stable.
Tips for Ensuring Stability and Safety
To ensure your cardboard shelves are stable and safe, follow these tips:
- Use high-quality cardboard: Choose thick, sturdy cardboard for your shelves.
- Reinforce the shelves: Use additional supports, such as cardboard strips or wood, to reinforce the shelves and prevent sagging.
- Secure the shelves: Securely attach the shelves to the support system using brackets, screws, or other fasteners.
- Avoid overloading the shelves: Do not place too much weight on the shelves, as this could cause them to collapse.
- Inspect the shelves regularly: Inspect the shelves regularly for signs of damage or wear and tear. Replace or repair any damaged shelves immediately.
Creative Applications and Variations
Cardboard shelves offer a surprisingly versatile platform for creative expression. Beyond their basic functionality, they can be transformed into unique pieces of furniture and decorative elements, reflecting personal style and adding character to any space.
Customizing and Personalizing
Cardboard shelves can be customized to match individual preferences and needs.
- Paint and Decorate: The surface of cardboard can be painted, stained, or covered with wallpaper, fabric, or other decorative materials to create a personalized look. You can create patterns, textures, and even incorporate artwork to match your decor.
- Shape and Size: Cardboard shelves can be cut and shaped to fit specific spaces or accommodate unique items. You can create curved shelves, angled shelves, or even build a multi-level shelf unit with varying heights.
- Additional Features: You can add features like lighting, hooks, or drawers to enhance the functionality and aesthetics of your cardboard shelves. For example, you can add LED strips to illuminate your shelves or incorporate hooks for hanging small items.
Unique Shelf Designs
Here are some examples of unique and creative cardboard shelf designs:
- Geometric Shelves: Create shelves with geometric shapes, such as triangles, hexagons, or circles, to add a modern and artistic touch to your space. These shelves can be arranged in various patterns and configurations to create a visually interesting display.
- Floating Shelves: Create the illusion of floating shelves by using thin cardboard and strategically placed brackets. These shelves are ideal for displaying small objects, such as books, plants, or decorative items.
- Ladder Shelves: Build a simple ladder shelf using cardboard and wooden dowels or PVC pipes. This type of shelf provides ample storage space and adds a rustic charm to any room.
Creative Uses
Cardboard shelves can be used for a wide range of purposes beyond simple storage:
- Displaying Collections: Cardboard shelves can be used to create a beautiful and organized display for your collections, such as books, figurines, or artwork. The customizable nature of cardboard allows you to tailor the shelves to the specific dimensions and requirements of your collection.
- Organizing Small Spaces: Cardboard shelves are perfect for maximizing storage space in small areas like dorm rooms, apartments, or closets. Their lightweight and modular design allows for easy rearrangement and adaptation to changing needs.
- Creating a Unique Workspace: Cardboard shelves can be used to create a functional and personalized workspace. You can build a desk, a bookshelf, or a storage unit to organize your office supplies, tools, or craft materials.
Safety Considerations: Diy Cardboard Shelves
While building cardboard shelves is a fun and creative project, safety should always be a top priority. By taking precautions and following a few simple guidelines, you can ensure a safe and enjoyable DIY experience.
Handling Cutting Tools
Using sharp cutting tools like utility knives or scissors requires careful attention and proper techniques.
- Always use a cutting mat or a sturdy surface to protect your work area and prevent accidents.
- Keep your fingers away from the blade path and use a ruler or guide to ensure straight and controlled cuts.
- Never leave sharp tools unattended, especially within reach of children.
- Store your tools in a designated area and keep them sharp and in good working condition.
Ventilation and Dust Inhalation
Cardboard can produce dust particles during cutting and assembly. Proper ventilation is crucial to minimize dust exposure and protect your respiratory health.
- Work in a well-ventilated area, preferably outdoors or with a fan circulating air.
- Consider using a dust mask to filter out airborne particles, especially if you are sensitive to dust.
- Clean up any dust or debris after completing your project to avoid accumulation and potential health hazards.
Storing and Maintaining Cardboard Shelves
Proper storage and maintenance are essential for ensuring the longevity and durability of your cardboard shelves.
- Avoid placing your shelves in humid or damp environments, as moisture can weaken the cardboard and lead to warping or mold growth.
- Store your shelves in a dry and well-ventilated area, away from direct sunlight and heat sources.
- Regularly inspect your shelves for signs of damage, such as tears, cracks, or weakening, and repair them promptly.
- To enhance durability, consider applying a sealant or protective coating to the cardboard surfaces, but always test a small area first to ensure compatibility.
Sustainability and Recycling
Building shelves from recycled cardboard is a fantastic way to embrace eco-friendly practices and reduce your environmental footprint. By repurposing this readily available material, you contribute to a circular economy and lessen the demand for new resources.
Environmental Benefits of Using Recycled Cardboard
Using recycled cardboard for DIY projects has numerous environmental benefits. Here are some key advantages:
- Reduced Landfill Waste: Cardboard is a common material that often ends up in landfills, where it takes a long time to decompose. By using recycled cardboard, you help divert waste from landfills, reducing the overall amount of waste generated.
- Conservation of Natural Resources: Manufacturing new cardboard requires significant amounts of trees and energy. By using recycled cardboard, you reduce the demand for these resources, contributing to the conservation of forests and energy resources.
- Lower Carbon Footprint: The production of new cardboard releases greenhouse gases, contributing to climate change. Using recycled cardboard significantly reduces the carbon footprint associated with manufacturing new materials.
Responsible Disposal of Cardboard Scraps
While using recycled cardboard is eco-friendly, it’s crucial to dispose of any scraps responsibly to avoid creating unnecessary waste. Here are some tips for responsible disposal:
- Recycle: Most cardboard scraps can be recycled. Check with your local recycling program for guidelines on how to properly sort and dispose of cardboard waste.
- Compost: Plain cardboard, without any coatings or laminations, can be composted. Shred it into smaller pieces to speed up the composting process.
- Reuse: Before discarding cardboard scraps, consider whether they can be reused for other projects or crafts. Get creative and find new ways to give them a second life.
Extending the Lifespan of Cardboard Shelves
While cardboard is durable, it’s susceptible to damage from moisture and wear and tear. By implementing these tips, you can extend the lifespan of your cardboard shelves:
- Protective Coatings: Apply a clear sealant or varnish to the surface of the shelves to protect them from spills and moisture. This will also help prevent staining and discoloration.
- Proper Maintenance: Avoid placing heavy objects on the shelves to prevent sagging. Regularly clean the shelves with a damp cloth to remove dust and dirt.
Inspiring Examples and Resources

The internet is a treasure trove of DIY cardboard shelf projects, showcasing the boundless creativity and ingenuity of individuals who transform this readily available material into functional and stylish furniture. From simple bookshelves to elaborate multi-tiered storage solutions, these projects inspire and offer valuable insights into design, construction techniques, and creative applications.
Examples of DIY Cardboard Shelves
Exploring online resources, you’ll find an abundance of inspiring DIY cardboard shelf projects. These examples demonstrate the versatility of cardboard as a material, ranging from minimalist designs to intricate, eye-catching creations.
- A simple, yet elegant bookshelf built from cardboard boxes and painted in a vibrant color. The shelves are supported by sturdy cardboard struts, creating a lightweight and functional storage solution for books, magazines, or decorative items. This project emphasizes the potential of cardboard for creating minimalist, functional furniture.
- A multi-tiered shelf unit crafted from recycled cardboard boxes, featuring a unique design that incorporates different box sizes and shapes. The shelves are arranged in an asymmetrical pattern, creating a visually interesting and dynamic display. This project highlights the creative potential of cardboard for constructing complex and unique furniture designs.
- A wall-mounted shelf unit made from corrugated cardboard, with a distinctive honeycomb pattern. This project demonstrates the use of cardboard for creating textured and visually appealing surfaces, while also showcasing its strength and stability. This project emphasizes the use of cardboard for creating visually appealing and functional wall-mounted shelves.
Online Resources and Tutorials
Several websites, blogs, and social media platforms offer detailed tutorials and guides on building DIY cardboard shelves. These resources provide valuable information on materials, tools, construction techniques, and design ideas.
- Instructables: A popular platform for DIY projects, Instructables features a vast collection of cardboard shelf tutorials, ranging from beginner-friendly projects to more complex designs. You can find detailed instructions, step-by-step photos, and user reviews, making it an excellent resource for learning about cardboard shelf construction.
- Pinterest: A visual search engine for ideas, Pinterest is a rich source of inspiration for DIY cardboard shelf projects. You can find a wide range of design ideas, from simple and functional shelves to elaborate and artistic creations. Pinterest provides a visual library of ideas for crafting cardboard shelves, offering diverse styles and design approaches.
- YouTube: A video-sharing platform, YouTube hosts a wealth of DIY cardboard shelf tutorials. These videos often provide visual demonstrations of construction techniques, material selection, and design considerations. YouTube offers a visual learning experience, showcasing the process of building cardboard shelves step-by-step.
Importance of Sharing and Documenting DIY Projects
Sharing and documenting DIY projects is essential for fostering creativity and inspiring others. By documenting your projects, you contribute to a collective knowledge base, allowing others to learn from your experiences and build upon your ideas.
- Sharing your DIY projects online, through platforms like blogs, websites, or social media, allows you to connect with a community of like-minded individuals. You can share your experiences, tips, and insights, fostering a collaborative environment for DIY enthusiasts.
- Documenting your projects, including step-by-step instructions, photos, and videos, makes it easier for others to replicate your designs and learn from your process. This helps to democratize DIY, making it accessible to a wider audience.
- By sharing your projects, you inspire others to explore their own creative potential and experiment with DIY. This fosters a culture of innovation and resourcefulness, promoting sustainable and creative solutions for everyday needs.
Embarking on your DIY cardboard shelf journey empowers you to create personalized storage solutions while minimizing your environmental impact. With a little creativity and resourcefulness, you can transform ordinary cardboard into exceptional, functional, and eco-conscious shelves.