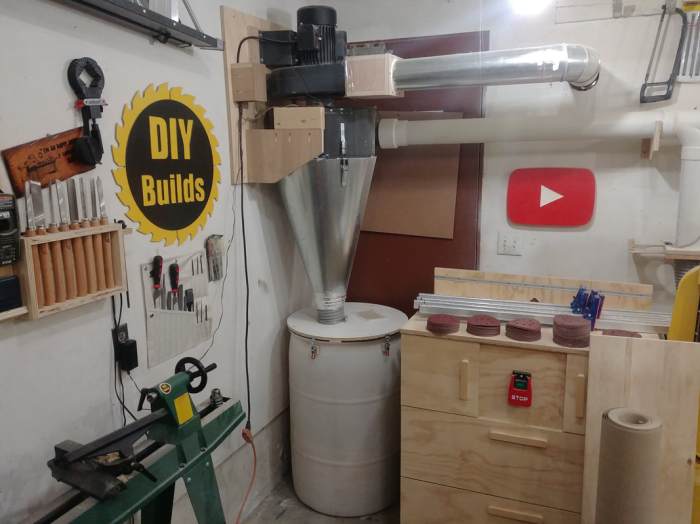
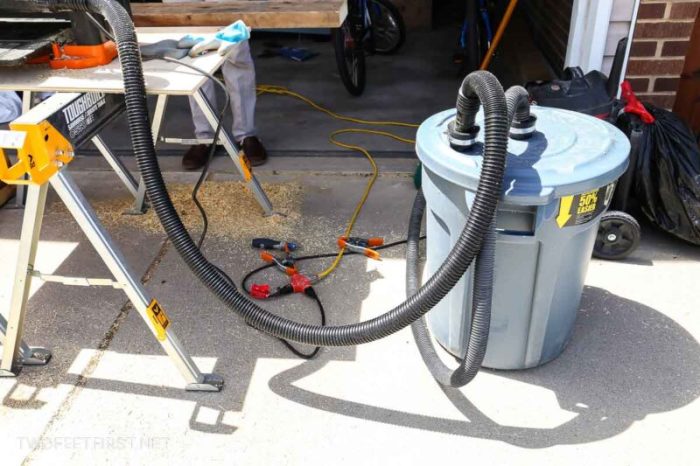
A DIY dust cyclone collector is a game-changer for workshops and home projects, offering a cost-effective way to dramatically improve air quality. This ingenious device uses centrifugal force to separate dust particles from the air stream, effectively capturing wood shavings, sawdust, and other airborne debris. By building your own dust cyclone collector, you gain control over your workshop environment, minimizing dust exposure and promoting a healthier workspace.
Table of Contents
The basic principle behind cyclone separation is simple: swirling air forces heavier particles towards the outer wall of the cyclone, where they fall into a collection bin. The cleaner air then escapes through a central outlet. This design effectively removes a significant portion of dust, significantly reducing the burden on your dust collection system and extending the life of your vacuum cleaner.
Understanding Cyclone Design and Components

A DIY dust cyclone collector uses centrifugal force to separate dust particles from the air stream. The design relies on a simple principle: heavier dust particles are flung outwards by the spinning air, while cleaner air rises and exits through a central outlet.
Components of a DIY Dust Cyclone
A typical DIY dust cyclone collector comprises several essential components that work together to achieve efficient dust separation.
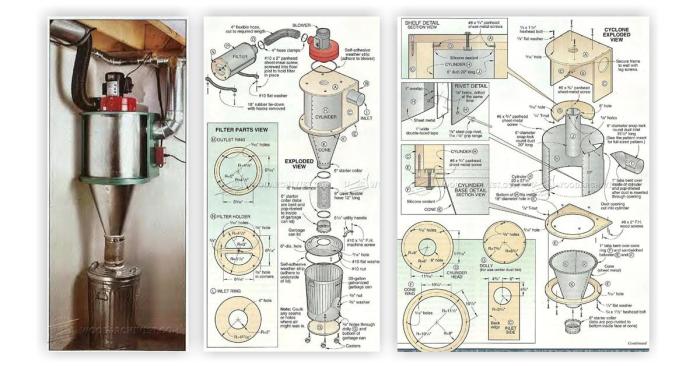
- Barrel: The main body of the cyclone, typically made from a plastic or metal barrel. It provides the necessary volume for the air to spin and allows for efficient separation.
- Inlet: The point where the dust-laden air enters the cyclone. The inlet is typically a pipe or duct that directs the airflow tangentially into the barrel. This tangential entry initiates the spinning motion of the air.
- Outlet: The point where the cleaned air exits the cyclone. The outlet is usually located at the top of the barrel, allowing the clean air to rise and escape.
- Vortex Finder: A central pipe or tube that extends down from the outlet. The vortex finder acts as a guide for the clean air, preventing it from being carried down with the dust.
- Dust Collection Container: A container at the bottom of the cyclone where the collected dust settles. This container can be a simple bucket or a more elaborate dust bin, depending on the design.
Role of Each Component in Cyclone Separation
Each component plays a crucial role in the separation process.
- Barrel: The barrel’s shape and size influence the air’s spin rate and the separation efficiency. A wider barrel allows for a slower spin, which may be suitable for larger dust particles. A narrower barrel encourages a faster spin, increasing efficiency for finer dust particles.
- Inlet: The inlet’s angle and position determine the direction and speed of the air entering the barrel. A tangential inlet creates a swirling motion, maximizing the centrifugal force that separates the dust.
- Outlet: The outlet’s size and position influence the flow of clean air. A larger outlet allows for faster air flow, potentially reducing the efficiency of dust separation. A smaller outlet can create backpressure, slowing the air flow and improving dust collection.
- Vortex Finder: The vortex finder guides the clean air upwards, preventing it from mixing with the dust at the bottom of the cyclone. Its shape and length can influence the efficiency of the separation process.
- Dust Collection Container: The container collects the separated dust, preventing it from escaping back into the air. Its size and shape can influence the amount of dust collected and the ease of emptying the container.
Design Variations of DIY Dust Cyclones
Different DIY cyclone designs have emerged, each with advantages and disadvantages.
- Simple Barrel Cyclone: This basic design uses a single barrel with a tangential inlet and a central outlet. It is relatively easy to build but may have lower separation efficiency compared to more complex designs.
- The “Thunderbolt” Cyclone: This design features a conical section at the bottom of the barrel, improving dust collection efficiency. The conical shape helps direct the dust downwards, reducing the risk of dust being carried back up the outlet.
- The “Reverse Flow” Cyclone: This design uses a secondary chamber to further filter the air before it exits the cyclone. The secondary chamber can be a simple container or a more complex filter system. This design can significantly improve the overall dust collection efficiency.
Testing and Optimizing Performance: Diy Dust Cyclone Collector

After constructing your DIY dust cyclone collector, the next step is to evaluate its effectiveness and fine-tune its design for optimal performance. This involves testing its dust collection efficiency and airflow characteristics, and making adjustments to improve its overall performance.
Testing Dust Collection Efficiency
The primary goal of a dust cyclone is to separate dust particles from the airflow. You can assess the effectiveness of your cyclone by examining the collected dust and the remaining dust in the exhaust.
- Visual Inspection: Observe the collected dust in the collection bin. A well-functioning cyclone should collect most of the larger dust particles, leaving a relatively clean exhaust stream.
- Particle Size Analysis: For a more quantitative evaluation, use a particle size analyzer to determine the distribution of particle sizes in the collected dust and the exhaust. This will give you a better understanding of the cyclone’s ability to capture different particle sizes.
- Air Quality Monitoring: Use an air quality monitor to measure the concentration of dust particles in the exhaust stream. Compare this to the dust concentration in the incoming airflow to estimate the cyclone’s efficiency.
Measuring Airflow
Airflow rate is another critical parameter for cyclone performance. A higher airflow rate generally results in better dust collection efficiency.
- Anemometer: Use an anemometer to measure the airflow velocity at the inlet and outlet of the cyclone.
- Flow Meter: Install a flow meter in the inlet or outlet duct to measure the volume of air passing through the cyclone.
Optimizing Cyclone Performance
Once you’ve tested your cyclone, you can make adjustments to improve its performance.
- Inlet Angle: The angle of the inlet duct affects the direction of the airflow entering the cyclone. Experiment with different angles to find the optimal value for your cyclone design. A steeper angle can improve dust collection efficiency, but it can also increase pressure drop.
- Vortex Finder Design: The vortex finder is a critical component that controls the airflow pattern inside the cyclone. Adjusting the diameter and length of the vortex finder can influence the separation efficiency.
- Cyclone Dimensions: The overall dimensions of the cyclone, including the diameter and height of the cylindrical section, can affect its performance. Experiment with different dimensions to optimize the cyclone for your specific application.
Troubleshooting Common Issues
While DIY cyclone collectors are relatively simple, there are a few common issues you may encounter.
- Poor Dust Collection: If the cyclone is not collecting dust effectively, check the inlet angle, vortex finder design, and overall dimensions. Ensure the inlet duct is properly connected to the source of dust, and that there are no leaks in the cyclone.
- Excessive Pressure Drop: A high pressure drop can reduce airflow and efficiency. Check for obstructions in the cyclone, such as accumulated dust or a poorly designed inlet duct.
- Unstable Airflow: An unstable airflow can lead to inconsistent dust collection. Ensure the cyclone is securely mounted and that the airflow is not being disrupted by external factors.
Environmental Impact and Sustainability

Dust collection is an essential aspect of maintaining a clean and healthy workshop environment. However, traditional dust collection methods can have a significant environmental impact. DIY dust cyclones offer a sustainable alternative to commercial dust collectors, reducing waste and promoting a cleaner workshop environment.
Benefits of DIY Dust Cyclones
DIY dust cyclones are a sustainable solution for dust collection, offering several environmental benefits:
- Reduced Dust Pollution: DIY dust cyclones effectively capture dust particles, preventing them from escaping into the air. This significantly reduces dust pollution, improving air quality in the workshop and surrounding areas.
- Waste Reduction: By capturing dust, DIY dust cyclones minimize the amount of dust that ends up in landfills. This conserves landfill space and reduces the environmental impact associated with waste disposal.
- Energy Efficiency: DIY dust cyclones typically use less energy compared to commercial dust collectors, reducing reliance on fossil fuels and minimizing carbon emissions.
- Reduced Material Consumption: Many DIY dust cyclone designs utilize readily available and often recycled materials, reducing the demand for new materials and minimizing resource extraction.
Sustainable Material Choices
When building a DIY dust cyclone, consider using sustainable materials to minimize environmental impact:
- Recycled Materials: Utilize recycled materials such as PVC pipes, metal drums, and scrap wood to reduce waste and minimize resource consumption.
- Durable Materials: Choose durable materials that will last for a long time, reducing the need for replacements and minimizing waste over the product’s lifespan. For example, using stainless steel for the cyclone body can provide long-lasting durability.
- Locally Sourced Materials: Sourcing materials locally reduces transportation costs and carbon emissions associated with long-distance shipping.
Sustainable Construction Methods, Diy dust cyclone collector
Sustainable construction practices can further reduce the environmental impact of your DIY dust cyclone:
- Minimize Waste: Carefully plan your project to minimize material waste. Consider using a CNC machine for precise cutting and reducing material scrap.
- Energy-Efficient Construction: Use energy-efficient tools and techniques during construction. For example, using a cordless drill powered by rechargeable batteries reduces energy consumption compared to corded drills.
- Proper Disposal: Dispose of any leftover materials responsibly. Recycle or donate usable materials to avoid unnecessary waste.
Creating a DIY dust cyclone collector is a rewarding project that empowers you to take charge of your workshop environment. With a little time, effort, and the right materials, you can construct a powerful and efficient dust collection system that improves air quality, protects your health, and enhances your woodworking experience. So, embrace the challenge, delve into the world of cyclone design, and unlock a cleaner and healthier workspace.
A DIY dust cyclone collector can be a great addition to your workshop, helping to keep the air clean and your lungs healthy. While it’s not as complex as the medical treatment cytoxan , which targets specific cells, the principle of separating particles from the air is similar. Both involve a careful design to achieve the desired outcome, whether it’s removing dust from the air or targeting cancerous cells.

